.webp)
To create and export slices in Photoshop, first use the Slice Tool to segment your image, then name each slice for easy identification. Next, choose 'Save for Web' under the Export options, select your desired slices, and save them in the specified format and location, streamlining the process of managing image segments.
What do you think? Submit your opinion to see what others have to say!
If you ever need to cut just a small section from a larger image for web use or detailed editing, slicing in Photoshop is your go-to solution. This technique allows you to divide an image into smaller, more manageable segments, each of which can be edited and saved independently. It's particularly useful in web design where different parts of an image are used for various webpage elements. By effectively using slices, you can export only what's needed without disturbing the rest of the image.
In This Article:
Accessing the Slice Tool: In Photoshop, slices are like segments of your image, each customizable and exportable independently. To start slicing, first locate the Slice Tool. It's typically nested with the Crop Tool in the Tools Panel on the left side of your workspace. Click and hold the Crop Tool icon to reveal the Slice Tool and select it.
Slicing the Image: With the Slice Tool active, you're set to define specific areas of your image as slices. Click and drag over the part of your image you want to slice. Imagine you're dividing your image into sections, like cutting a pie into individual slices. Each slice can then be manipulated or exported separately. For precise slicing, use guides to ensure even and accurate divisions.
Naming Your Slices: Once you've created a slice, it’s important to name it. Double-click on a slice to open a dialog box where you can assign a name. This name will be the filename of the exported slice. If double-clicking doesn’t open the dialog box, right-click on the slice and choose 'Edit Slice Options' to access the naming feature. This step is akin to labeling layers or render passes, ensuring each piece is identifiable and organized.
Browse Templates, Extensions, Plugins & Presets....
Search
Browse Graphics, Mockups, Brushes & More!
Search
Preparing for Export: Now that your image is sliced and named, it’s time to export. Go to 'File' > 'Export' > 'Save for Web'. This legacy feature is your gateway to optimizing images for the web, similar to selecting render settings in a video editing software.
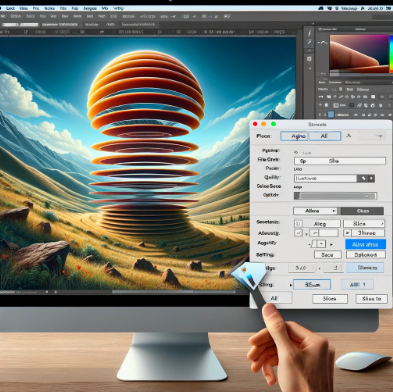
Configuring Export Settings: In the Save for Web dialog, select your preferred file format (like JPEG) and set the quality. If you need to export specific slices, use the Slice Select Tool (found in the same menu as the Slice Tool). Click on the slices you want to export, holding down the 'Shift' key to select multiple slices. This is like choosing specific render passes to export in a video project.
Selecting Slices for Export: To export all your slices, make sure 'All Slices' is selected in the Slices option. If you only want to export certain slices, choose 'Selected Slices'. This selection process is crucial, as it determines which parts of your image will be saved and which will be excluded.
Saving Your Slices: Finally, choose where to save your slices and click 'Save'. Photoshop typically creates an 'Images' folder to store these slices, streamlining the organization of your exported files. This last step is akin to rendering a video, where all your settings and selections culminate in the creation of a final product.
Issue with Slice Tool Activation: If the Slice Tool isn't active or visible, reset your toolbar to default settings. This can be done from the menu in the top right corner of the Tools Panel.
Naming Slices Challenges: Should you face issues with naming slices, ensure to right-click and select 'Edit Slice Options'. This alternative method will lead you to the same naming dialog box.
Selecting Multiple Slices Difficulty: For selecting multiple slices, remember to hold down the 'Shift' key. This is similar to selecting multiple layers or objects in other software.
Finding Exported Files: If you can't locate your exported files, recheck the destination folder you chose during the export process. Ensure you're not inside an existing 'Images' folder when saving your slices, as Photoshop tends to automatically save in the last used directory.
Room 37, 18 Footbridge Bvd, Wentworth Point, NSW Australia
jack@freevisuals.net - Emails checked hourly
0414 708 083
.png)
.png)
.png)
.png)


.webp)

.png)
.png)

.png)
.png)
.png)
.png)
.png)
.png)
%20(1).png)

.png)
