.webp)
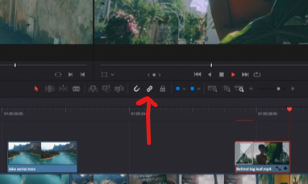
To separate the audio file from a video in DaVinci Resolve 18+, simply right-click on the clip and select "Unlink" from the context menu once you have selected the particular media channel that you wish to separate. For a more detailed guide on how to separate audio tracks from video layers in your DaVinci Resolve timeline, continue reading this post.
.png)
What do you think? Submit your opinion to see what others have to say!
Separating Audio tracks from your video tracks in DaVinci Resolve is a helpful ability to have during the editing process. By separating the audio track, you can edit each layer individually however you like. You may also want to replace the audio track with another if the original sound does not fit the video. Some DaVinci users also prefer to add alternative audio or a musical score to enhance the overall presentation of their films and increase its appeal to viewers. Therefore, in order to professionally edit your video in DaVinci Resolve, you'll almost always need to separate the audio from the video sometime during your editing process.
The process of separating and individually editing audio and video layers that were previously connected in DaVinci Resolve is a fairly easy process, depending on what you're ultimately trying to achieve. Editors may want to independently make changes to audio and video tracks so they can:
Having said that, here is how you can unlink and isolate audio from video tracks in DaVinci Resolve 17 and beyond.
Open up the edit tab, then select the option to silence the audio from the video volume button. You can also just drag the slider handle all the way to the bottom to mute the sound completely. Now here's what you should do if you needed to remove the entire audio track itself:
Browse Templates, Extensions, Plugins & Presets....
Search
Browse Graphics, Mockups, Brushes & More!
Search
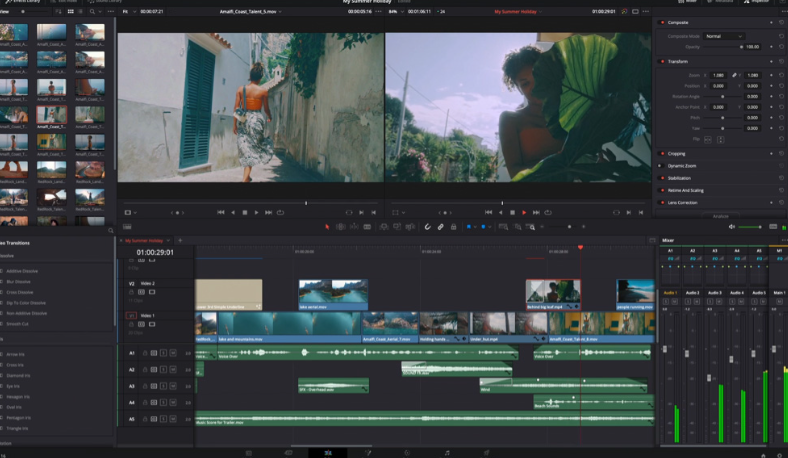
Once your clip is in the timeline, the real magic begins. You'll notice that the video and audio are linked, which means any alteration to one affects the other. However, there are moments in the editing process where you might need to manipulate them separately. Here's how:
Here's a video for the visual learners:
If you're trying to remove or enhance parts of your recording, we'd recommend you use a more advanced software such as Izotope RX7 or the FL Studio Equalizer + compression effects. However, if you are not willing to purchase any additional software, sound isolation can be done to some extent in the newer versions of DaVinci Resolve. Here's how:
Here's a summary of what was explained in the video:
Removing the background noise can be a strenuous and time-consuming process especially when there are different sounds in the background, but by following the steps above, you'll be able to achieve the greatest clarity you can achieve in an audio track edited in DaVinci Resolve 17. Once again, for a better result, we'd recommend using proper audio editing software. Adobe Audition is a great example among others like the ones we mentioned above.
If you're looking to isolate vocals in DaVinci Resolve, it involves the same steps as removing background noise, but with one minor difference. Here's how to do it with vocals instead of background noise:
Just keep in mind that the clarity of the isolated vocals will depend on the audio and how well the separation algorithm works. Some audio may separate better than others.
And once again, here's a video with a more in-depth explanation:
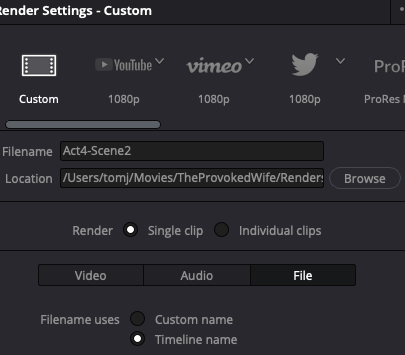
If you don't need the audio track all together, follow the steps above to unlink the audio layer. Once your audio and video layers are separated, you can delete (DEL) either channels individually without deleting the other. See step 4 in the section above to learn how to do this with more context.
So, to wrap it up, separating audio from video in DaVinci Resolve is an essential skill to learn that can come in handy in almost every single video project. Whether you're looking to isolate vocals, take out background music, or just want more control over your audio and video, DaVinci Resolve has got you covered. The process of separating audio is simple, and even if you're new to video editing, you can give it a shot. Of course, the quality of the separated audio will vary depending on the audio track itself, but that's just part of the fun. All in all, if you're looking to step up your video game, audio separation in DaVinci Resolve is definitely worth exploring.
Room 37, 18 Footbridge Bvd, Wentworth Point, NSW Australia
jack@freevisuals.net - Emails checked hourly
0414 708 083
.png)
.png)
.png)
.png)


.webp)

.png)
.png)
.png)
.png)
.png)
.png)
.png)
.png)
%20(1).png)

.png)
