.avif)
Generate videos, images, music and voiceovers with AI + unlimited downloads
.avif)
.avif)
.avif)
.avif)
Start Creating Now!
Starting a YouTube channel without showing your face is easier than ever in 2026, and you don't need a single paid subscription to do it. This guide walks through the complete faceless channel workflow, from picking a niche and writing a script to generating a free AI voiceover, sourcing royalty-free stock footage and music, editing with free templates, and designing a thumbnail that actually gets clicked. Along the way, it covers what to watch out for (copyright pitfalls that can quietly demonetize a channel) and how to stay compliant with YouTube's AI disclosure rules. Every tool and asset referenced is free, with links to FreeVisuals' own libraries throughout.
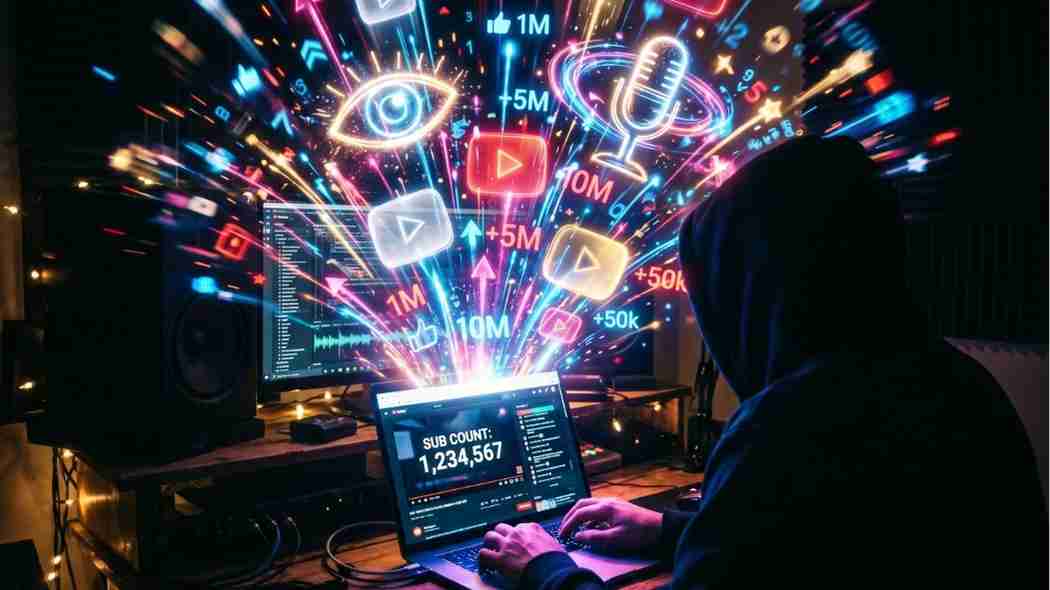
You don't need to show your face, own a camera, or know how to edit to build a YouTube channel in 2026. Over 70% of educational and explainer channels now use AI voices as their primary narration method, and the audience generally doesn't care, as long as the content is good. Faceless channels rely on voiceover, stock footage, and clean editing instead of an on-camera presenter, which means the barrier to entry that used to stop most people, the camera, the confidence, the editing skill, has basically disappeared.
What hasn't disappeared is the cost. Most guides on this topic point you toward a stack of paid subscriptions: a voice tool, a footage library, a music license, an editor with a monthly fee. This guide walks through the exact same workflow successful faceless channels use, but built entirely from free assets and free tools, including everything FreeVisuals already offers. By the end you'll know what to use, where to get it, and how it all fits together into a finished, uploadable video.
We've pulled together every free resource referenced in this guide, including stock footage, music, templates, and AI prompt packs, on our dedicated Free YouTube Assets page, so you can come back to one place rather than hunting through the site as you work through each step.
This isn't a niche trend anymore, it's become one of the default ways new channels get started. The shift is being driven by three things happening at once: AI voice tools have gotten good enough that audiences genuinely don't notice or don't care, free stock footage libraries have gotten deep enough to cover almost any topic, and editing software, paid and free alike, has gotten fast enough that a finished video no longer takes a full day to produce.
The numbers back this up. Across educational and explainer content specifically, AI narration has gone from a novelty to the default, and the channels using it aren't being penalised for it, they're often outperforming personality-led channels in the same niche on watch time. For anyone weighing up whether to start a channel where they appear on camera or one where they don't, the honest answer in 2026 is that the faceless route is no longer the easier, lesser option. For a lot of niches, it's simply the smarter one.
If you want a broader look at the tools professional faceless creators are now building entire production pipelines around, our Latest Free AI Video Editing Tools roundup is a good next read once you've finished this guide.
A faceless YouTube channel is any channel that doesn't show the creator on camera. Instead of a host talking to the lens, the content is delivered through voiceover, stock footage, animations, text overlays, or screen recordings. The viewer never sees who's behind it, and increasingly, they don't expect to.
You've almost certainly watched dozens of these without realising it. The "Top 10 facts about..." channels. Finance explainer channels that break down stocks over clean motion graphics. True crime channels narrating over case photos and slow zooms. History channels pairing archive footage with a calm, authoritative voice. Some of the largest channels on YouTube, including infographic and documentary-style channels with audiences in the tens of millions, are built entirely on this format. WatchMojo, Kurzgesagt, and The Infographics Show didn't get there by accident; they proved the model works at massive scale.
The reason this format keeps growing is simple: YouTube's algorithm has no preference either way. It cares about watch time, click-through rate, and whether people finish your videos. It has no "is this a real human face" detector, and it never will, because that's not what determines whether a video keeps someone watching. Good pacing, a clear hook, and content people actually want does that. Once you accept that, the whole project becomes a production problem rather than a confidence problem, and production problems can be solved with the right tools.
Before touching a single tool, decide what your channel is actually about. This matters more for faceless channels than for personality-led ones, because without a face or a personal brand holding the audience's attention, the topic itself has to do that work. People subscribe to a faceless finance channel because they want the information, not because they like the host, so the niche needs to be strong enough to carry the channel on its own.
Some niches consistently outperform others in this format. Finance and investing content tends to attract higher-paying advertisers and a CPM well above the YouTube average. True crime and history channels benefit from naturally long watch times, since narration-driven storytelling keeps people locked in for the full runtime. Tech explainer channels work well because screen recordings and product B-roll are easy to source and don't require any acting or presenting at all. Relaxation, ASMR, and "calm" content channels work differently again, succeeding through sheer volume of watch hours rather than high CPM.
Pick something you can realistically keep making content about for months, not just one video. The tools in the rest of this guide will speed up production, but they can't replace having something worth saying.
Watch this video that includes links to free niche idea downloads, Epidemic Sound for music, and a recommended voiceover tool . It's a beginner-focused walkthrough covering niche selection through monetization, published recently and squarely matching your post's audience and intent.
Every faceless video starts with a script, and this is the step people most often try to skip. It's tempting to jump straight to voiceover and footage, but a video built on a weak script will always underperform, no matter how good the visuals look.
Write for the ear, not the eye. A script that reads well on a page often sounds stiff once it's narrated aloud, so keep sentences shorter than feels natural when writing, and read it out loud yourself before recording or generating a voiceover. Open with a hook in the first five to ten seconds; this is the single biggest lever for retention on any video, faceless or not. A free AI writing tool like ChatGPT or Claude can help you structure a script quickly once you know your topic and angle, but the strongest channels still write with their own research and point of view, using AI to speed up structure and pacing rather than to generate the substance from scratch.
This is the step that actually replaces the on-camera presenter, and it's the one that's changed the most in the last couple of years. A natural-sounding AI voice can narrate your entire script without you recording a single word, and modern AI voices are genuinely difficult to distinguish from a human narrator, particularly once they're mixed with music and sound design underneath.
Match the voice to your niche. A flat, neutral delivery works fine for tech explainers and list-style videos, but true crime and documentary content benefit from a voice with more weight and pacing control. Most free-tier voice tools let you preview several voices before committing, so test a short paragraph of your actual script rather than a generic sample line, since delivery can vary noticeably depending on sentence structure and punctuation.
If you want more control over tone and direction before you get to the voiceover stage, our free AI prompt packs include prompt structures you can adapt for scripting and voice direction across a range of styles, which is a useful way to keep your narration consistent across an entire series rather than figuring out tone from scratch on every upload.
Once you have a voiceover, you need visuals to match it, and this is where most new faceless creators either spend money they don't need to, or settle for clips that feel repetitive across every video. A good rule for pacing faceless content: introduce a new clip, text callout, or subtle zoom roughly every six to ten seconds. Static footage held too long is one of the fastest ways to lose a viewer's attention, even when the narration itself is strong.
This is where FreeVisuals does most of the heavy lifting for you. Our free stock videos library covers city skylines, nature, lifestyle, and abstract B-roll in both 4K and HD, all cleared for commercial use on monetised YouTube channels with no attribution required. If you need still images instead, whether for a thumbnail background, a cutaway, or a supporting graphic, our free stock images collection covers categories from real estate to lifestyle and business scenes. Build a small personal library of clips and images around your niche early on; it saves a huge amount of time once you're producing regularly instead of searching from scratch on every video.
One thing worth planning for early: as a channel grows and starts publishing several times a week, even a deep free library can start to feel repetitive across videos, especially in narrower niches like finance or true crime where the same handful of search terms keep turning up the same clips. At that point, a lot of creators supplement their free footage with a premium library for unlimited downloads and a much larger pool of clips to pull from. Envato Elements is a solid option here, since one subscription covers stock video, music, templates, and graphics together rather than billing for each separately.
This is the step with the most room to quietly damage a channel, so it's worth slowing down here. Using AI-generated music that mimics copyrighted tracks, or stock footage and music sourced without proper licensing, can permanently demonetise a channel overnight, sometimes well after the video has already gone live and started earning. Copyright strikes are the single most common reason new faceless channels lose monetisation, and unlike most production mistakes, this one isn't easy to walk back.
The fix is simple: only use music and sound effects that are explicitly cleared for monetised YouTube use, and keep a record of where each track came from. Our free royalty-free music library is built specifically for this, covering everything from upbeat backing tracks to moody underscores, with every track safe for Content ID. Our free sound effects collection adds whooshes, transitions, and impact sounds on top of that, the small details that make an edit feel polished rather than amateur, without introducing any copyright risk into the mix.
If you end up wanting a wider range of tracks than a free library can offer, particularly for channels that publish often and need music that doesn't start repeating across episodes, Artlist is worth a look. It's built specifically for video creators rather than general stock libraries, with an unlimited licence that covers every video you ever publish under one subscription, so you're not tracking individual licences per track as your upload schedule grows.
With your voiceover, footage, and music ready, the last step is assembling everything into a finished video. This is usually the part new creators dread most, but it's also the part templates solve most directly. Whether you're working in Premiere Pro, DaVinci Resolve, or CapCut, free templates can take care of intros, transitions, and lower thirds, so you're building a recognisable visual style for your channel instead of designing every element from nothing on every upload.
Lay your voiceover track down first, then build your visuals around it rather than the other way around. Cut on action where you can; a transition that lands on a moment of movement in the footage reads as far more intentional than a hard cut on a static shot. Add your text callouts and on-screen graphics after the rough cut is locked, not before, since edit timing tends to shift as you trim, and re-positioning text on every cut is far slower than placing it once on a finished timeline. Once your rough cut is in place, go back through and check pacing against the six-to-ten-second rule from Step 4 before exporting.
For creators publishing multiple videos a week, building a template library of your own pays off fast. Motion Array is one of the more popular options for this, since it gives unlimited access to a constantly growing library of premium editing templates, transitions, and motion graphics that go well beyond what's available for free, which matters once you're trying to keep a consistent, branded look across dozens of uploads rather than just one video.
A finished video that nobody clicks on doesn't get watched, no matter how good the script and editing are. Thumbnails are one of the single biggest drivers of click-through rate on YouTube, and for a faceless channel, they're doing a job that would normally fall to a presenter's face and expression: making a stranger curious enough to stop scrolling.
High contrast, a clear focal point, and minimal text tend to outperform busy, cluttered designs, especially at the small size thumbnails actually get viewed at on mobile. You don't need design skills to produce one that performs well. Our AI prompt packs for thumbnails give you ready-to-use prompts for generating eye-catching backgrounds in tools like Midjourney, DALL-E, or Leonardo AI, so you can go from a blank page to a scroll-stopping thumbnail in a few minutes rather than a few hours.
YouTube requires creators to disclose the use of altered or synthetic content that looks realistic. In practice, this means flagging it as part of the upload process when your video includes a synthetic voice, AI-generated visuals, or anything else a viewer might otherwise mistake for unaltered real footage. Using AI tools for voiceover, editing, or visuals is fully supported on the platform, as long as you follow these disclosure guidelines and your content isn't misleading.
This is a straightforward checkbox in YouTube Studio when you upload, and it won't affect your ability to monetise or your reach. The disclosure exists to protect viewers from being deceived, not to discourage creators from using AI tools, so treat it as a normal part of your publishing checklist rather than something to work around.
None of these seven steps are difficult on their own. Where most new creators get stuck isn't any single step, it's trying to do all of them from scratch on every video instead of building a repeatable system. Once you've picked your niche, found a voice you like, and settled on a visual style using a template or two, the actual production time per video drops sharply, often from several hours down to well under one once the workflow is familiar.
If you're specifically building out for YouTube rather than short-form platforms, our Free YouTube Assets hub brings together the music, templates, and prompt packs covered in this guide in one place, and our stock footage and music libraries are both updated regularly, so it's worth checking back as you scale up your publishing schedule rather than treating your first visit as the only one you'll need.
Check out this real-results case study showing the exact free AI tool stack used to build and monetize a faceless channel, with a linked guide for viewers wanting to replicate the approach. Good complement to your post since it's proof-of-concept framing rather than pure how-to.
Yes. Most mid-range faceless channels generate between $2,000 and $10,000 per month through a combination of ad revenue, sponsorships, and affiliate links, with top-tier creators earning significantly more once a channel is established.
No. Every step in this guide, including voiceover, footage, music, editing, and thumbnails, can be done using free tools and free assets, with no required monthly subscriptions to get started.
No, as long as your content is original and you follow YouTube's disclosure guidelines for AI-generated material. AI voice use on its own is not a violation of YouTube's monetisation policies.
Stock footage combined with voiceover narration is the most popular format, since it requires no special equipment and can be produced entirely with free tools and assets.
Finance and investing, true crime, history and documentary content, tech explainers, and relaxation or ASMR are among the strongest performing faceless niches, largely because they suit a voiceover-led format and attract an audience that values information over personality.


.avif)


.avif)


