.avif)
Freevisuals
Learn how to edit free stock footage in Adobe Premiere Pro with this detailed beginner tutorial. Step-by-step guide to importing, cutting, effects, color grading & exporting using free clips from iStock & more.
Welcome, aspiring video editors! If you're diving into the world of video production, learning how to edit free stock footage in Premiere Pro is one of the best ways to build your skills without breaking the bank. Adobe Premiere Pro is a powerhouse editing software used by professionals worldwide, and pairing it with high-quality free stock footage can help you create stunning videos for YouTube, social media, blogs, or even client projects. In this comprehensive 2500-word tutorial, I'll guide you like a seasoned instructor teaching eager students—step by step, with practical tips, common pitfalls to avoid, and real-world examples.
Whether you're a complete newbie or have some experience, this guide covers everything from sourcing free stock footage to exporting your polished final product. We'll focus on SEO-friendly keywords like "how to edit free stock footage in Premiere Pro," "Premiere Pro tutorial for beginners," and "free video editing tips" to help you find this resource easily. By the end, you'll have the confidence to tackle your own projects. Let's get started!
Before we jump into the editing process, let's clarify what stock footage is. Stock footage refers to pre-recorded video clips that you can license and use in your projects. These can include scenic landscapes, urban scenes, animations, or abstract visuals—perfect for adding professionalism to your videos without filming everything yourself.
Why opt for free stock footage? As a student or beginner editor, budget constraints are real. Free options allow you to experiment freely, learn editing techniques, and build a portfolio. Plus, many free sources offer high-resolution clips (up to 4K) under creative commons licenses, meaning you can use them commercially with proper attribution.
However, not all free footage is created equal. Look for sites that provide royalty-free licenses to avoid legal issues. In this tutorial, we'll incorporate examples from popular platforms like istockphoto (which offers some free weekly downloads) and Shutterstock


Remember, when downloading, check resolutions, frame rates, and licenses. Common free sites beyond these include Pexels, Pixabay, and Videvo, but we'll stick to incorporating visuals from the specified ones for this guide.
Sourcing quality free stock footage is the foundation of your edit. Start with reputable sites to ensure compatibility with Premiere Pro. For SEO purposes, if you're searching online, use queries like "free 4K stock footage download" or "royalty-free video clips for editing."
iStockPhoto While primarily a paid site, iStock offers free files of the week, including footage. Sign up for their newsletter to get notifications. Their library includes high-production-value clips, like nature scenes or urban timelapses. Download in MP4 format for easy import into Premiere Pro.
freevisuals.net: This site specializes in free visuals, including overlays, backgrounds, and effects that pair perfectly with stock footage. Their 4K assets are great for adding polish—think light leaks or transitions that you can composite over your base clips.
Other tips: Always download in the highest quality available. Match frame rates (e.g., 24fps for cinematic looks) to your project settings. Organize your downloads in a dedicated folder for quick access. As students, build a library over time—start with 10-20 clips per theme.
In my classes, I emphasize curation: Select footage that tells a story. For example, combine a beach clip from iStock with a sunset overlay from freevisuals.net for a cohesive mood.
Alright, class—time to launch Premiere Pro! If you don't have it, download the trial from Adobe's site or use your student discount for Creative Cloud access.
Step 1: Open Premiere Pro and create a new project. Go to File > New > Project. Name it something descriptive, like "FreeStockFootageEditTutorial.prproj." Choose a location on your hard drive with plenty of space—video files eat storage!
Step 2: Set your project settings. In the New Project dialog, under Scratch Disks, set everything to the same folder for organization. This ensures your previews and caches stay tidy.
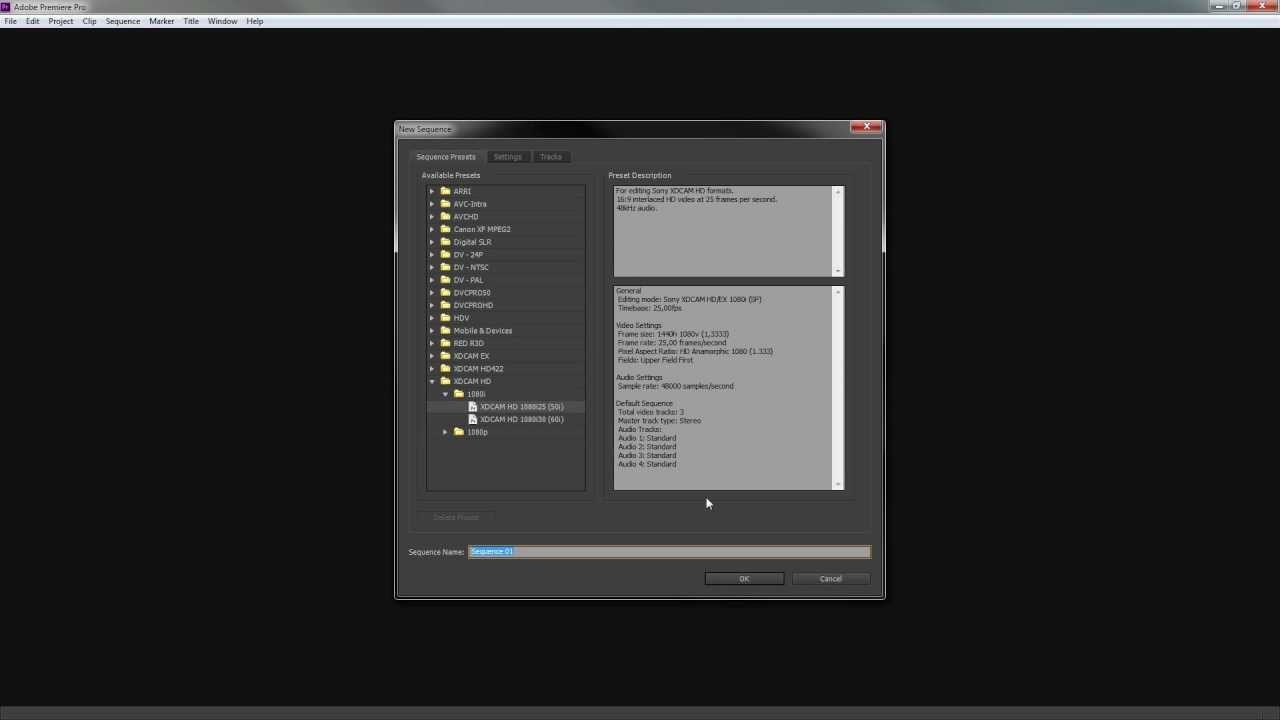
As shown here, the interface is intuitive once you get the hang of it.
Step 3: Create a new sequence. Right-click in the Project panel > New Item > Sequence. Choose a preset like DSLR 1080p24 for HD projects. Match this to your stock footage's specs to avoid issues like black bars or stuttering playback.
Pro Tip: Use keyboard shortcuts early—Ctrl+N for new project saves time. Common mistake: Forgetting to set sequence settings, leading to mismatched frame rates. Always check your footage properties first.
In this setup phase, think like a pro: Plan your story. Sketch a rough storyboard—intro with stock nature clip, build with urban footage, end with overlaid effects.
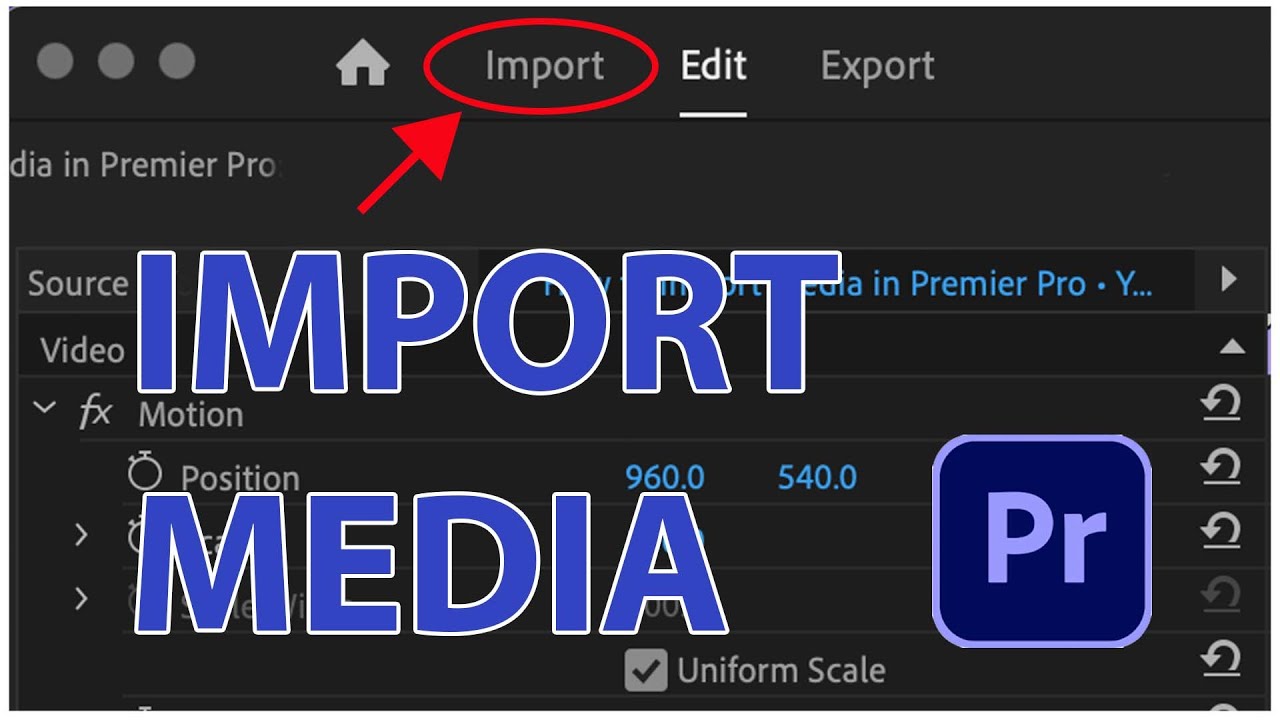
With your project ready, let's import those free clips. This step is crucial for workflow efficiency.
Step 1: Locate your downloaded footage. From sites like iStock or freevisuals.net, you've got MP4s or MOVs. Drag them directly into the Project panel or use File > Import (Ctrl+I).
Step 2: Organize bins. Right-click in the Project panel > New Bin. Create folders like "Stock Footage," "Overlays," and "Audio." Drag your imports accordingly. For example, place iStock beach clips in "Stock Footage" and freevisuals light leaks in "Overlays."
Step 3: Preview and interpret footage. Right-click a clip > Modify > Interpret Footage. Adjust frame rate if needed—stock footage often comes in 30fps, but cinematic edits prefer 24fps.
Teaching Moment: Students often overload projects with too many imports. Start small—import 5-10 clips. If a file won't import, check codec (H.264 is Premiere-friendly). Use Media Encoder for conversions if necessary.
Now, your assets are in place. Experiment: Double-click a clip to open in the Source Monitor and mark In/Out points for subclips.
The timeline is where magic happens. This is Premiere Pro's core—think of it as your canvas.
Step 1: Drag clips from the Project panel to the timeline. Start with your base stock footage. For instance, drop an iStock urban scene as your opening.
Step 2: Use the Razor tool (C key) to cut clips. Position the playhead and slice—remove unwanted parts. Snap tools (S key) help align clips seamlessly.
Step 3: Arrange and trim. Use the Selection tool (V) to move clips. Ripple Edit (B) for precise trims without gaps.

5 Timeline Tips for Faster Editing in Adobe Premiere Pro
Notice the layered tracks for video and audio.
Advanced Beginner Tip: Nest sequences (right-click > Nest) for complex edits. Add B-roll from freevisuals.net overlays on upper tracks—set blend mode to Screen for light effects.
Common Pitfall: Overcutting. Aim for rhythm—hold shots 3-5 seconds. Practice with a simple montage: Nature clip > transition > urban clip > overlay fade.
Spend time here; good cuts make or break your video. As your instructor, I recommend timing to music—import free audio tracks next.
Now, polish with effects. Premiere Pro's Lumetri and Effects panels are your friends.
Step 1: Select a clip > Effect Controls panel. Adjust position, scale, or rotation for custom framing.
Step 2: Apply transitions. Drag Cross Dissolve from Effects > Video Transitions > Dissolve between clips.
Step 3: Effects galore. Search "Lumetri Color" in Effects panel for grading. Boost saturation on dull stock footage.
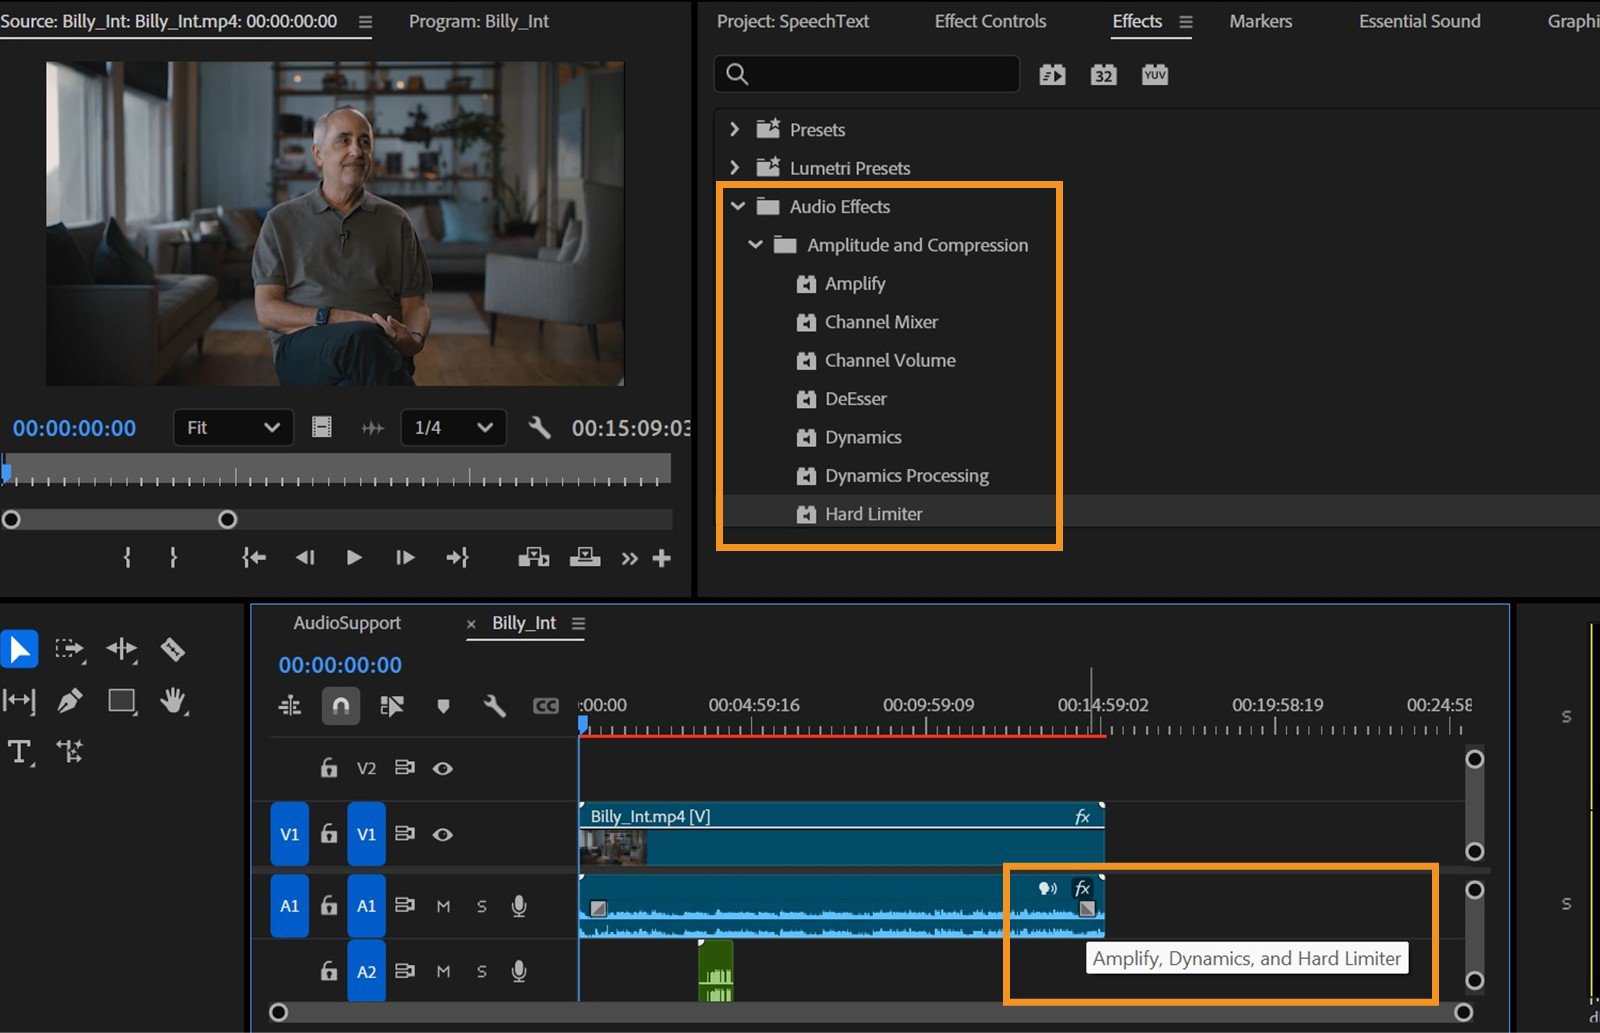
Apply effects
The Effects panel offers endless creativity.
Incorporate freevisuals.net assets: Import an overlay, place above your clip, and adjust opacity. For iStock footage, add vintage effects for storytelling.
Pro Advice: Keyframe animations—right-click > Add Keyframe for smooth changes. Avoid overdoing effects; subtlety wins.
Students, experiment but save versions (File > Save As) to revert if needed.
Color grading unifies your footage. Use Lumetri Color: Adjust exposure, contrast, then creative looks.
For audio: Import free sound effects or music. Use Essential Sound panel to mix—duck music under dialogue.
Tip: Sync audio waveforms for perfect timing with stock clips.
This section elevates amateurs to pros—practice on varied footage.
Final step: Export.
Step 1: Select sequence > File > Export > Media (Ctrl+M).
Step 2: Choose H.264 format, Match Source preset.
Step 3: Set output name and location > Export.
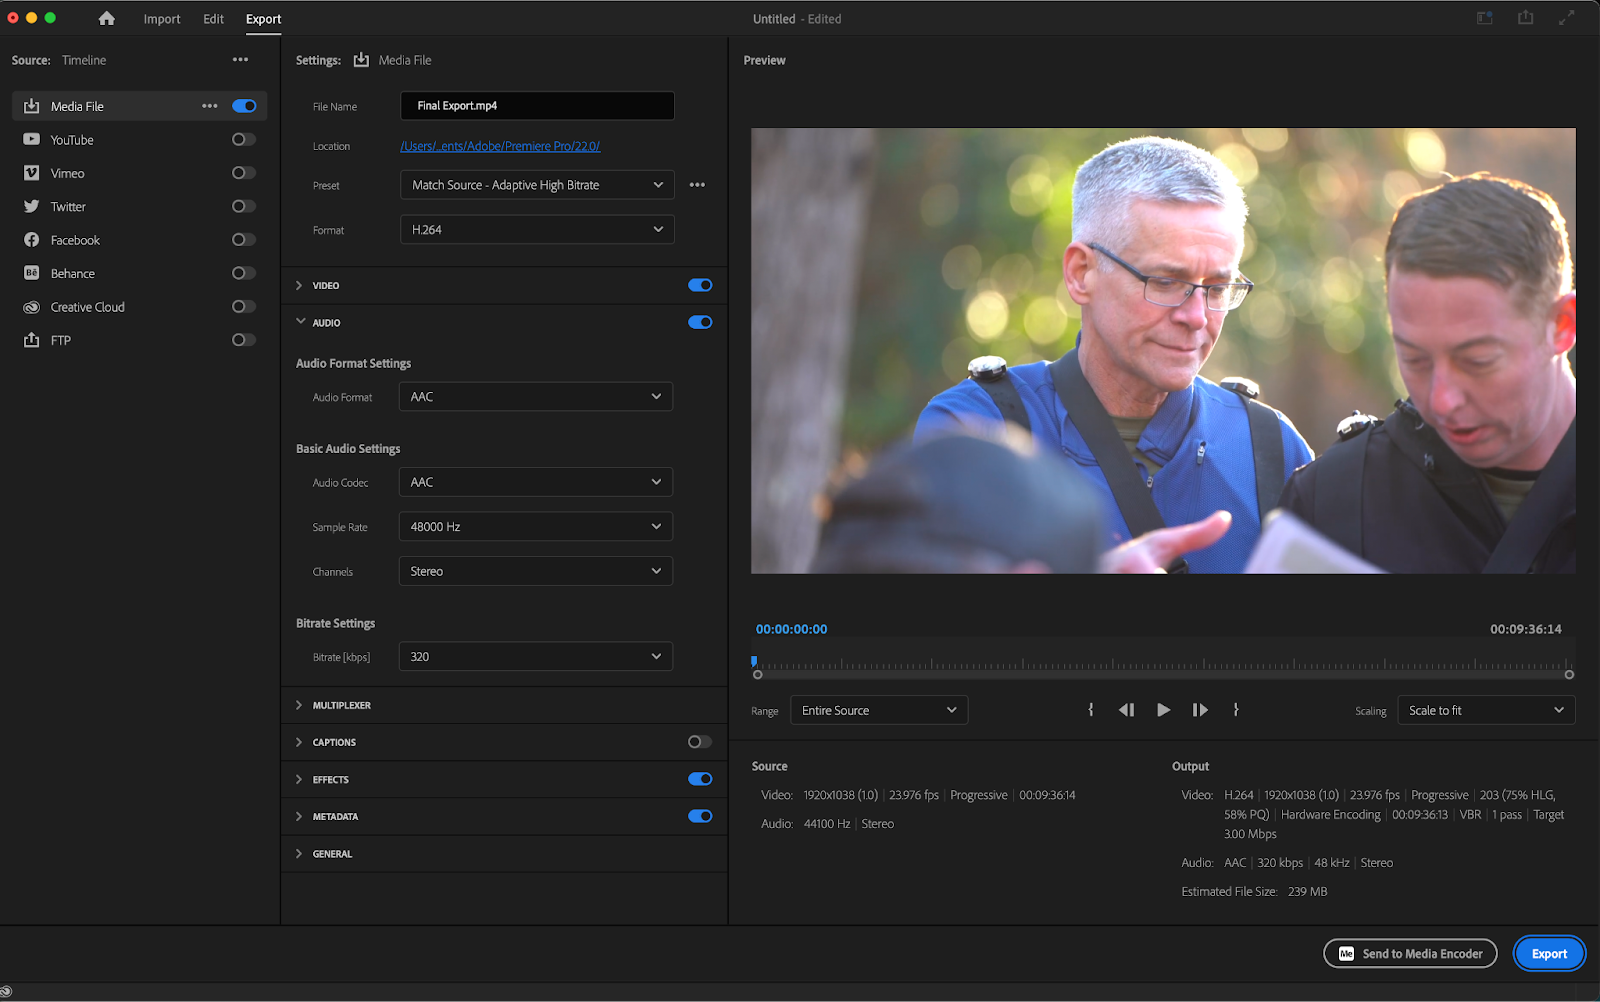
How to Export Video From Adobe Premiere Pro
Optimize for web (YouTube) or high quality.
Common Error: Wrong bitrate—aim 10-20 Mbps for HD.
Troubleshoot: Crashes? Update GPU drivers.
You've now mastered how to edit free stock footage in Premiere Pro! Practice with clips from iStockphoto and other stock footage sites. Share your edits in comments—happy editing!


.avif)


.avif)
.avif)
.avif)
.avif)


