.avif)
Freevisuals
I spent the last year figuring out how to make proper long-form AI videos without hitting credit walls or paying for an expensive plan. Here is the complete workflow, from script to export, for making YouTube and social media videos between 1 and 10 minutes long using three tools that cost less than $42 a month combined.
Here is the thing nobody tells you when you first discover AI video tools. They are incredible for 15-second clips, pretty good for 60-second social posts, and then they hit a wall the moment you try to make anything longer.
You want a five-minute YouTube explainer. A three-minute Facebook brand video. A ten-minute educational piece that actually holds attention and gets watch time. And every AI tool you try either caps you at 90 seconds, buries the longer formats behind an expensive plan, or produces something that looks great in the first scene and falls apart by minute two.
I have spent a good chunk of the last year figuring out how to actually solve this. Not workarounds that feel like workarounds, but a real, repeatable workflow that produces genuinely watchable long-form AI video between one and ten minutes long, for YouTube, Facebook, LinkedIn, and anywhere else that rewards longer content.
This tutorial walks you through every step. I will tell you exactly which tools to use, in what order, how long each step takes, and what the whole thing costs per month. By the end you will have a workflow you can run every single week.
🎬 Try InVideo AI free here — The engine that drives this entire workflow. Start free and upgrade when you are ready.
🎨 Browse Envato Elements templates — Polish your videos with professional intros, lower thirds and transitions.
🎵 Get 2 months free on Artlist — Music that keeps your videos monetised and copyright claim free.
Before we get into the workflow, it is worth being honest about why this is even a problem in the first place. Most AI video generators are built around generating short clips. Sora, Runway, Kling, Pika, they all do short-form brilliantly. But you end up with beautiful individual clips and no coherent way to string them into something that works as a complete video. The pacing breaks down, the visual style shifts between clips, and the whole thing starts to feel like a slideshow rather than a proper video.
The credit systems make it worse. Credits burn faster than most people expect. Generating a single video can chew through 1000 to 2500 credits depending on length and how many times you regenerate scenes that do not work. Once credits are gone you are either waiting for the weekly reset or upgrading your plan.
And then there is the length cap. Most free or entry-level AI video plans genuinely restrict you to short clips. Getting to five or ten minutes of finished video requires either paying for a premium tier or being smart about your workflow.
The solution I am going to walk you through uses InVideo AI as the production hub. It lets you work inside a single system where multiple AI video generation models are already integrated, switch between them depending on the shot you need, and build longer videos without breaking your sequence or starting from scratch every time. Around that we layer in Envato Elements templates for professional polish and Artlist for music that keeps monetisation intact.
Here is the toolkit before we start.
InVideo AI is your main video generation and assembly platform. The free plan lets you test the workflow before committing, but for real publishing you will want the Plus plan. More on costs further down. Start here.
Envato Elements gives you professional intro templates, lower thirds, transition packs and end screens. One subscription covers everything you need across every video you make. Browse the template library here.
Artlist is your royalty-free music library. It is essential for any video you want to monetise on YouTube without copyright claims eating into your revenue or taking your video down. Grab two months free here.
A video editor is where you assemble the final video from all your generated pieces. DaVinci Resolve is completely free and handles everything this workflow needs. Premiere Pro works too if you are already in the Adobe ecosystem.
Free assets from FreeVisuals fill in the gaps. Stock footage, sound effects, LUTs and supplementary B-roll are all available here at no cost. Browse the free library here.
Here is a quick breakdown of the three main paid tools in this workflow before we get into the steps.
The key insight that makes long-form AI video achievable without paying for a hundred-dollar-a-month plan is this: do not try to generate one long video in a single prompt. Generate it in structured chapters and assemble them in your editor.
Think of it like how a TV series is made. Nobody records a 45-minute drama in a single continuous take. They shoot scenes, they build episodes in the edit suite. We are doing exactly the same thing, except our scenes are AI-generated chapters, each one a complete unit of content that locks together into a finished video.
Here is the full workflow at a glance before we go through each step in detail.
Step 1 is planning. You write your script and break it into chapters. This takes about 15 to 20 minutes.
Step 2 is generation. You create each chapter as an AI video segment in InVideo. Allow 30 to 45 minutes for a five-minute video.
Step 3 is polish. You add a professional intro, lower thirds and transitions from Envato. Budget 20 to 30 minutes.
Step 4 is music. You find and add a licensed soundtrack from Artlist. This takes about 10 minutes.
Step 5 is assembly. You pull everything together in your editor. Budget 20 to 30 minutes.
Step 6 is export. Final render and platform-specific versions. Allow 15 minutes.
Total time for a complete five-minute video sits at around one and a half to two and a half hours. For a ten-minute video, budget two and a half to four hours. That sounds like a commitment until you compare it to building the same video from scratch. A professionally produced five-minute explainer built the traditional way takes a full day at minimum. We are getting there in an afternoon.
Time: 15 to 20 minutes
This is the step most people skip, and it is the reason their AI videos fall apart at the three-minute mark. The AI is only as good as the structure you give it. Without a clear chapter plan it generates visually interesting content that does not hold together as a narrative. You end up with something that looks fine in isolation and makes no sense as a complete watch.
Start by deciding your video topic and target length. For YouTube, the sweet spots for watch time and algorithm performance break down roughly like this.
Two to four minutes works well for social media cross-posting, product explainers and brand stories. Five to eight minutes is the YouTube sweet spot for educational and how-to content. Eight to twelve minutes suits long-form tutorials, documentary-style pieces and in-depth reviews.
Once you have your length, divide your topic into chapters. For a five-minute video, aim for four to five chapters of roughly 60 to 75 seconds each. For a ten-minute video, eight to ten chapters works well.
Write each chapter as a short paragraph, three to five sentences, covering one specific point. This becomes your generation prompt for InVideo. The more specific you are at this stage, the better the output will be and the less time you will spend fixing things later.
Here is a worked example for a five-minute video titled "Best Budget Cameras for YouTube in 2026."
Chapter 1 runs 60 seconds and covers why camera choice matters for YouTube in 2026. Chapter 2 runs 75 seconds on what to look for in a budget YouTube camera. Chapters 3, 4 and 5 each run 75 seconds covering one camera option each, with pros, cons and who it is best suited to. Chapter 6 is a 30-second verdict and call to action.
Six chapters, five to six minutes, clear throughline from start to finish. That is all you need before you open InVideo.
Time: 30 to 45 minutes for a five-minute video
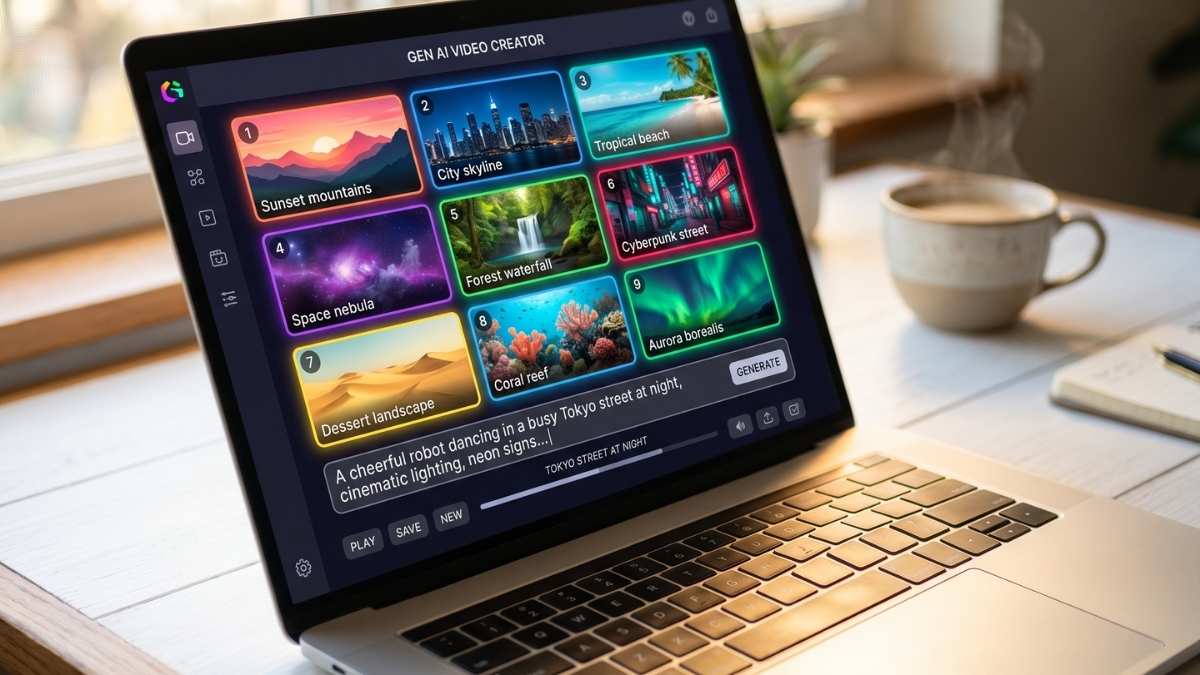
InVideo AI is where the heavy lifting happens. It is a browser-based platform that lets you generate videos from a text prompt. You describe the video you want, InVideo assembles a draft using stock footage from its 16 million plus asset library, adds a voiceover and applies captions automatically.
If you want to see InVideo in action before diving into the steps, this video is worth five minutes of your time. It walks through exactly how to generate longer AI videos inside InVideo using the same text-to-video workflow we are covering in this tutorial, including how the Magic Box editing commands work and how to keep visual consistency across a multi-scene video without regenerating everything from scratch.
Open InVideo and select the Text to Video workflow rather than the templates option. This activates the full AI generation mode rather than a pre-built structure.
For each chapter, write a generation prompt that includes the topic of that specific chapter, the tone you want (educational, energetic, calm, cinematic), the voiceover style (professional, conversational, documentary), the target length in seconds, and any specific visuals you want to see.
Here is an example prompt for Chapter 3 of the camera video.
"Create a 75-second cinematic product review segment about budget mirrorless cameras for YouTube creators. Professional but approachable voiceover tone. Include B-roll of someone filming outdoor content, close-up camera detail shots, and footage of a YouTube studio setup. Smooth transitions between shots. Auto-captions in clean white text at the bottom."
Hit generate, let InVideo build the draft, then use the Magic Box text commands to refine anything that does not work. You can tell it things like "change the voiceover to sound less formal" or "replace the office footage with outdoor city shots" or "slow down the pacing in the second half." All of this happens without regenerating the whole segment from scratch, which saves significant time and credits.
Repeat this process for every chapter. Each generation takes two to four minutes. For a five-chapter video you are looking at 15 to 20 minutes of generation time plus 10 to 15 minutes of refinement across all chapters.
The most efficient approach is to generate all your chapters first, then do a single review pass before refining any of them. Batching the review is faster than refining each chapter individually before moving on to the next.
One thing to be realistic about: for niche topics, expect to manually replace around a third to half of the B-roll clips. The model does its best but it cannot always find the exact shot you have in mind. When a clip does not fit, use the Replace Clip feature to search for a better match within InVideo, or make a note to replace it with footage from Envato or FreeVisuals during the assembly stage.
Time: 10 to 15 minutes
Once you are happy with each chapter, export them individually as MP4 files at 1080p. Export at 720p only if you are testing and not publishing. Anything you intend to publish on YouTube, Facebook or LinkedIn needs to be 1080p minimum, and that requires at least the Plus plan on InVideo.
Name your exports clearly. Chapter-01.mp4, Chapter-02.mp4 and so on. Keep them in a dedicated project folder. This sounds basic but it saves real frustration when you are importing into your editor and trying to work quickly.
If your video needs both a landscape YouTube version and a vertical version for Reels or Shorts, export both formats from InVideo now. It is significantly faster to generate the vertical format at this stage than to reformat it in your editor later.
Time: 20 to 30 minutes
This is the step that transforms your AI-generated content from something that looks obviously machine-made to something that looks properly produced. The biggest giveaway that a video was built with AI tools is the opening. AI tools generate solid middle sections but the start rarely has the punch of a properly designed branded intro.
If you have never used Envato Elements inside Premiere Pro before, this walkthrough covers the whole process from installing the plugin through to dropping a customised template onto your timeline. It is one of the clearest guides available for getting up and running quickly, and it covers MOGRTs, lower thirds and transitions specifically which are the three asset types you will use most in this workflow.
This is where Envato Elements earns its place in the stack.
You need four things from Envato for this workflow.
A channel intro template. Download a 10 to 15 second animated intro that fits your channel brand. Customise the logo, colour and channel name once, then reuse it on every video you make. Search "YouTube opener" or "channel intro Premiere Pro" and filter by your editing software. There are hundreds of options at every style level from minimal to cinematic.
A lower thirds pack. You will use lower thirds every time a new section starts, when you want to display a stat or quote, or when you introduce a named source or product. Download a pack that matches the visual style of your intro so the whole video feels like it was designed by the same person.
A transitions pack. The joins between your AI-generated chapters are where the assembly seam shows most clearly. A good transitions pack hides those seams and gives the finished video a consistent feel throughout.
An end screen template. Every YouTube video needs a properly designed end screen that encourages subscriptions and links to related videos. Download an animated end screen that matches your intro style.
Import all your chapter exports from InVideo into your editing software and drop them onto the timeline in order. Add your Envato intro at the very beginning, your chapter transitions between each segment, and your end screen at the close. Add your lower thirds at the start of each new chapter. They work double duty as visual chapter markers that help viewer retention because the audience knows they are moving into new information.
One thing I have found from years of doing this: pick your Envato template pack once per channel or client, customise it properly, and stick with it. Consistency across videos builds brand recognition far faster than variety does.
Time: 10 minutes
Background music is the element most creators get wrong on AI-generated videos. Either they skip it entirely and the result feels cold, they use unlicensed music and the video gets claimed or muted, or they pick music that fights with the narration instead of sitting underneath it.
Artlist solves all three problems at once. The library is curated specifically for video work, meaning every track is built to sit under narration without pulling attention. The licensing covers commercial YouTube use on paid plans. And the Clearlist system auto-registers your videos against Content ID claims so you do not have to manually protect every upload.
One thing that trips people up with music licensing on YouTube is knowing what to do when a Content ID claim lands on a video even though the music is fully licensed. This video covers exactly how the Artlist clearance system works and walks through the process of removing a claim step by step. Worth watching before you publish your first video so you know what to do if it happens.
For a long-form explainer or educational video, here is what to look for. Medium tempo, somewhere between 90 and 120 BPM. Fast music pulls attention away from narration. Slow music makes everything feel sluggish. Optimistic, curious or neutral mood. Save big cinematic swells for your intro and outro. The body of the video needs music that sits comfortably under information without demanding attention. Light electronic, piano-led or acoustic instrumentation works best under voiceover. Avoid heavy drums or anything with lead vocals.
Search Artlist by mood and instrumentation rather than genre. Filter for Corporate, Inspiring or Documentary mood tags depending on your content type. Download your track, import it into your timeline and set the level to sit around 20 to 24 dB below your voiceover.
For a ten-minute video you will probably need two tracks to avoid repetition. Pick a main track for the body of the video and something slightly more energetic for the intro and outro sections. Artlist has a Find Similar feature that makes it easy to find tracks that feel related to each other rather than jarring when you cross-fade between them.
Claim your two free months on Artlist here before you publish your first video. That is two months of fully licensed music at no cost, which covers a solid run of videos before your first payment goes through.
Time: 20 to 30 minutes
With all your elements in the timeline, chapters, intro, transitions, lower thirds, end screen and music, there are four final things to do before export.
Colour grading first. InVideo footage tends to be well-exposed but slightly flat. A single LUT applied across the whole timeline as an adjustment layer lifts the visual quality noticeably. The free LUT library on FreeVisuals has clean, professional grades that work well on the neutral palette of most AI-generated stock footage. Apply it once across everything so all your chapters match.
Captions next. If you have not burned captions into your InVideo segments, add them now. For YouTube and Facebook, auto-generated platform captions are adequate. For Instagram Reels, LinkedIn and TikTok, burned-in captions perform significantly better because most mobile viewers watch without sound. Style your captions to match your Envato templates in terms of font and colour so everything reads as one cohesive production.
Audio balance after that. Run through the timeline and check that the music is not competing with the voiceover at any point. The narration should sit clearly on top throughout. If any section of the AI voiceover sounds thin or robotic, consider re-recording it with your own voice. Even a single 90-second re-record in one section dramatically improves the perceived production quality of the whole video.
Thumbnail last. Export a still frame from your video to use as a thumbnail base. AI footage occasionally produces genuinely great thumbnail frames, look for high contrast and a clear foreground subject. Take it into Canva, add your title text in a bold readable font and export at 1280 by 720 pixels.
Time: 15 minutes
Export settings matter more than most people realise. Here are the right specs for each platform.
For YouTube: H.264 MP4, 1920 by 1080 at minimum, 4K if your InVideo plan supports it, CBR at 16 Mbps for 1080p, stereo audio at 320 kbps.
For Facebook: H.264 MP4, 1920 by 1080, maximum file size 10GB. Upload natively to Facebook rather than sharing a YouTube link. Facebook organic reach is significantly better for native video.
For LinkedIn: MP4, 1920 by 1080, maximum 5GB. LinkedIn native video performs dramatically better than external links. Upload directly every time.
For Instagram Reels and TikTok: H.264 MP4, 1080 by 1920 vertical. Up to 90 seconds for Reels, up to 10 minutes for TikTok. Use the vertical version you generated in InVideo at Step 3.
For YouTube Shorts: Vertical 1080 by 1920, under 60 seconds. Pull a compelling chapter from your long-form video, trim it to under a minute, add captions and you have a Shorts clip that drives traffic back to the full video. One production session, multiple pieces of content.
Here is exactly what this workflow costs per month across three usage levels.
The Starter stack at $15 a month is genuinely viable for four to six videos per month. You use free assets from FreeVisuals for music and supplementary footage, DaVinci Resolve as your editor at no cost, and InVideo Plus for generation. It is a professional workflow for less than the cost of a streaming subscription.
The Regular stack at $41.49 a month is where most working creators will land. Envato Elements adds professional templates that make your videos look like they cost a lot more to produce, and Artlist covers your music licensing with full YouTube Content ID protection. At this level you can comfortably produce eight to ten polished long-form videos per month.
The Pro stack at $94.41 a month is the agency setup. InVideo Max gives you 200 generation minutes and 4K exports, Artlist Pro covers full commercial client licensing, and Premiere Pro rounds out the toolkit for complex edits. A single client retainer for monthly social video content covers this entire stack.
Here is a realistic time breakdown for each video length once you have done this workflow a few times and are comfortable with each step.
These are realistic numbers for someone who has been through the workflow a few times. Your first run will take longer, so plan for roughly double on the first video. By the fourth or fifth video you will be hitting these targets pretty consistently.
This is the most common frustration with InVideo and honestly with every AI video tool. The fix is specificity in your prompts. The more precise your visual description, the better the output. Instead of "technology content," write "close-up of hands typing on a mechanical keyboard in a clean home office, natural window lighting, shallow depth of field." Instead of "business meeting," write "two people reviewing a document at a minimalist conference table, professional environment, eye-level camera angle."
When the footage still does not match after refining the prompt, replace it manually using InVideo's Replace Clip feature. If nothing in the InVideo library fits, grab relevant free stock footage from FreeVisuals or download from Envato Elements. Both libraries will have what InVideo could not find.
This is an assembly issue rather than an AI issue. The fix is consistent colour grading with one LUT applied across everything, consistent music running as a single track under all chapters rather than a different track per segment, and good transitions at every chapter joint. Your Envato transitions pack is specifically designed to hide those seams. Use a consistent transition style throughout the whole video. Mixing zoom transitions with film burns with glitch effects in the same video is the fastest way to make something feel unfinished.
This is a real limitation of the current generation of AI voice tools. If the voiceover quality is not good enough for your brand or audience, record your own. A decent USB microphone under $100, a duvet draped over your recording setup to kill room reverb, and your own voice will outperform any AI voiceover for building audience connection. Use InVideo's AI voiceover as the first draft to guide your pacing, then re-record in your own voice over the finished video in your editor. The AI narration tells you the rhythm. Your real voice makes it feel human.
The tell-tale signs of AI video are overly smooth camera movements, faces that soften or distort at the edges, a generic stock footage aesthetic, and identical lighting across every scene regardless of the supposed location. Combat all of these in the assembly stage by breaking up the AI footage with real footage at intervals. Even a 10-second clip of a real environment between AI-generated segments disrupts the pattern enough that viewers stop consciously noticing the AI aesthetic. The free stock footage on FreeVisuals works perfectly for this. Drop in a handful of real clips throughout and the whole video breathes differently.
Generating a ten-minute video is one challenge. Getting people to actually watch it is a completely different one, and watch time is everything on YouTube.
A few things that make a real difference for AI-generated long-form content.
Open with a hook rather than your branded intro. Put your most interesting claim or a compelling question in the first 15 seconds before the animated opener even starts. AI tools tend to generate bland openings because the prompt does not specifically demand a hook. Write your first chapter prompt explicitly to open with something that creates genuine curiosity in the first sentence.
Use chapter markers. YouTube's chapter feature, which you activate by adding timestamps to your description, improves completion rate because viewers know where they are in the video and feel more committed to watching the rest. Your Envato lower thirds work as visual chapter markers on screen. Match them to your YouTube timestamps.
Keep every chapter tight. AI video tends to pad when the prompt gives it room to. If a chapter runs over its target length without adding new information, trim it in your editor. Tight pacing is the difference between a 40 percent completion rate and a 70 percent completion rate on a five-minute video.
Add a pattern interrupt every 90 seconds or so. A change in music energy, a graphic callout, a new lower third, a transition, anything that signals to the viewer's brain that something new is starting. Your Envato pack gives you all the tools for this. It keeps viewers watching without feeling like you are manipulating them.
Everything above is built for long-form video. But the same workflow compressed works beautifully for short-form too.
For a 60-second Reel or YouTube Short, here is the whole process.
Write a single punchy prompt for InVideo covering one topic with one clear argument at 60 seconds. That takes about five minutes. Generate in InVideo and refine once, which takes 10 to 15 minutes. Export vertical 9:16 at 1080p. Add one lower third from your Envato pack, one transition and a brief Artlist music clip, which takes about five minutes. Export and publish in another five minutes.
Total time is 25 to 30 minutes for a polished, properly produced Reel or Short.
The smart move is to produce your long-form YouTube video first, then pull the best chapter from it as your short-form clip. One production session gives you a complete YouTube video and three or four Shorts or Reels that promote the full piece back to a wider audience. That is a real content operation for a single creator working alone.
The reason most people give up on AI video tools is not that the technology is bad. It is that they try to do something the tools were not designed for, which is generating one long polished video in a single click. When the result is mediocre, they write off the whole category.
The chapter-based workflow here solves that problem. InVideo gives you the production layer to build longer videos from structured segments without starting from scratch every time. Envato Elements makes the finished product look like it cost far more to produce than it did. Artlist keeps your music licensed and your monetisation intact.
That is a complete YouTube channel. That is a social media content operation. That is a client video service. Built around tools that would have seemed impossible five years ago and are now available for under $42 a month.
Start with the free tier on InVideo to get comfortable with the workflow. Grab your two free months on Artlist while that offer is running. Work through this tutorial on your first video and do not worry if it takes twice as long as the estimates say. The second video will be noticeably faster. The third faster again. After five videos it becomes second nature.
🎬 Start InVideo AI free, no credit card needed
🎨 Browse professional video templates on Envato Elements
🎵 Claim 2 free months on Artlist before your first publish
Yes. The Text to Video workflow in InVideo is specifically designed for longer content including YouTube videos, educational pieces and faceless channel content. The chapter-based approach in this tutorial is the most reliable method for producing consistent five to ten minute videos without burning through your generation credits too quickly.
For testing and learning the workflow, the free plan works fine. For anything you intend to publish, you need at least the Plus plan. Free plan exports include a watermark and are capped at 720p, which is below the quality standard for YouTube and social media publishing in 2026.
Most Envato video templates are built for After Effects and Premiere Pro. If you use DaVinci Resolve, the stock footage, music and sound effects from Envato work without any issues. For templates specifically, use the software filter when searching and look for DaVinci Resolve-compatible options, or look for MOGRT files which work across multiple editing platforms.
Yes. Artlist uses a Clearlist system that auto-registers your YouTube channel and protects published videos from false Content ID strikes. You connect your channel once and the protection applies automatically to everything you publish going forward.
The Plus plan gives you 50 AI generation minutes per month. In practical terms that is enough for approximately five to eight longer marketing or educational videos per month, or ten to fifteen shorter social media clips, depending on how much regeneration and refinement each video needs.
Yes, but check your plan levels first. InVideo Plus and Max both include commercial usage rights. Artlist Pro covers commercial client use. Envato Elements Core covers commercial licensing on all downloaded assets with a lifetime licence per registered project. Make sure you are on the right tier of each platform before delivering work to a paying client.
Jack is a professional video editor and colorist with over 10 years of experience across broadcast, commercial and digital content production.
This post contains affiliate links. FreeVisuals.net may earn a commission if you subscribe through the links in this article at no additional cost to you. All opinions are based on genuine first-hand experience.


.avif)


.avif)
.avif)
.avif)
.avif)


