.avif)
Freevisuals
Download the free Hollywood Gold LUT. A warm, rich cinematic color grade with lifted shadows and amber highlights. Works in Premiere Pro, After Effects,
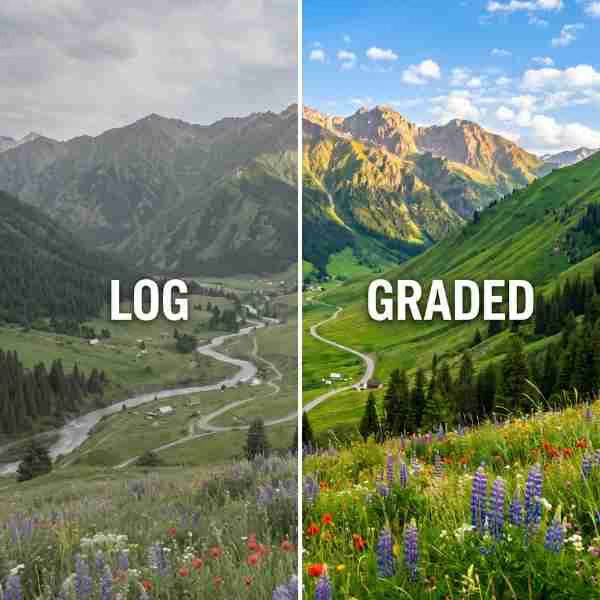
Download FREEDownload NOW!There is a reason so much premium commercial contenthas a warm, golden quality to it. Warmth reads as expensive. It reads as intentional. It makes footage feel like it was shot at the right time of day by someone who knew exactly what they were doing, even when it was not. The Hollywood Gold LUT is built around that idea.
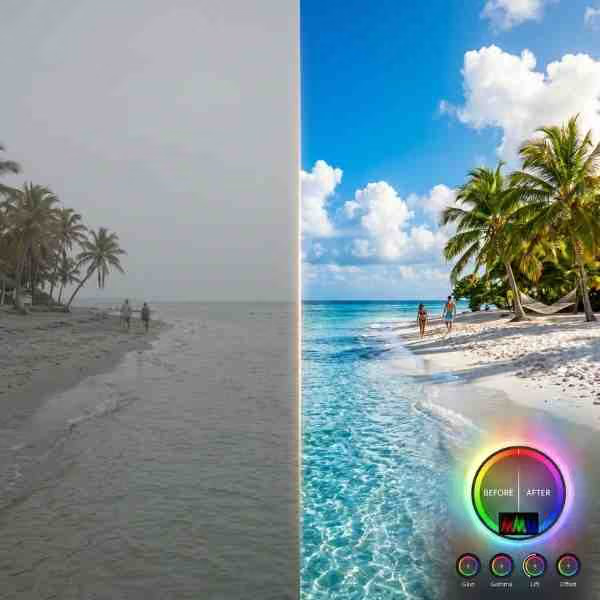
This grade lifts the black point slightly so your shadows never feel harsh or crushing. It pushes highlights into a rich amber territory and gives the whole image a golden quality that communicates polish without announcing itself as a heavy filter. The result is footage that looks like it cost more to produce than it did.
Shadows lift and shift warm, reducing harshness and giving a more organic, cinematic feel. Highlights pick up an amber tone that references the quality of high-end film stocks and premium commercial work. Skin tones respond particularly well, reading as healthy and warm rather than flat or clinical. Overall, the image gains a subtle warmth that feels earned rather than applied.
This is one of the most versatile grades in the pack. Warmth is flattering to almost every type of footage and a wide range of subject matter, but it performs best where the light in the scene already has some natural warmth to work with.

Lifestyle and vlog content benefits enormously from this grade because warmth signals authenticity and comfort to the viewer. Travel videos shot in warm climates, afternoon light, or golden hour conditions will see their natural warmth amplified into something genuinely cinematic. Brand and product videos for food, fashion, beauty, or home goods use warm grades routinely because the colour psychology of amber and gold signals quality and desirability. YouTube talking head content, especially in home studio setups with warm practical lighting, responds very well to Hollywood Gold because it makes the setting feel intentional rather than incidental.
Wedding videography, portrait work, outdoor interview footage, and social media content for Instagram and TikTok where a consistent warm aesthetic performs well all benefit from this grade. If your content is about people, warmth almost always works.
Footage shot under cool, clinical lighting such as fluorescent offices, LED panels with a blue cast, or overcast blue daylight can end up fighting with the warmth this LUT introduces. In those situations, bring the opacity down to 50 to 60 percent and the warmth will feel more like a gentle lift than an applied filter. If your footage has a strong colour cast in any direction, do a basic white balance correction before applying the LUT.
Recommended opacity: 65 to 85 percent

Hollywood Gold and Golden Hour together at 55 and 35 percent respectively creates a deeper, more saturated warmth that suits high-end travel and portrait content. Stack with Faded Film at 30 percent for a softer, more nostalgic version of the warm look that works well for personal and lifestyle content. Add Dust and Grain at low opacity if you want to introduce an analogue texture into the warmth for a more organic result.
In Premiere Pro, go to the Color workspace and open the Lumetri Color panel. Click on the Creative tab, open the Look dropdown, and select Browse. Navigate to the .cube file on your hard drive and open it. Apply the LUT to an adjustment layer sitting above all your clips rather than directly to each clip. This keeps your original footage untouched and lets you adjust or remove the grade without touching individual clips.
In Final Cut Pro, go to the Effects browser and search for Custom LUT. Drag the effect onto your clip or a compound clip. In the Video Inspector, you will see the Custom LUT section where you can click to import your .cube file. Use the Mix slider to control how strongly the LUT is applied.
In CapCut on desktop, select your clip in the timeline, go to the Adjustment panel, and select LUT. Click Import and navigate to your .cube file. Use the intensity slider to dial the effect up or down.
For a full walkthrough of applying LUTs in both Final Cut and Premiere Pro, this YouTube tutorial covers both platforms in one video: How to Use LUTs and Color Grading in Final Cut and Premiere Pro:
Warm, golden footage pairs well with orchestral, acoustic guitar, soft piano, or ambient electronic tracks. The emotional register of the music should match the warmth and confidence of the grade. Artlist has a deep library of royalty-free music that covers all of these styles and is fully licensed for use across YouTube, TikTok, Instagram, and all other social platforms with a single subscription, which removes any risk of copyright claims on monetised content:
Hollywood Gold is a strong starting point. But if you want to build a full colour grading toolkit around that warm, amber foundation, both Envato and Artlist have premium LUT libraries that pair exceptionally well with it and will give you far more range across different types of footage.
Envato Elements has one of the largest LUT collections available on a single subscription. The 1000 Cinematic Color Presets pack is one of the most downloaded on the platform and covers 12 categories including cinematic, travel, wedding, vlog, fashion, and aerial, all in .cube format compatible with Premiere Pro, After Effects, Final Cut, and DaVinci Resolve. For warm and golden-toned work specifically, the travel and wedding categories within this pack sit naturally in the same colour territory as Hollywood Gold, meaning you can use this free LUT as the base and pull from those premium options when you need a slightly different take on the same warmth. Explore the full Envato collection here.
Also worth looking at on Envato is the Blockbuster Set, a 10-LUT pack built around cinematic, punchy, high-contrast looks that includes several warm-leaning grades. Stack the Hollywood Gold at around 40 percent under one of the Blockbuster warm cinematic grades at 60 percent and the combination gives you a layered depth you would not get from either one alone. The lifted blacks and amber highlights from Hollywood Gold act as a foundation that the Blockbuster's contrast and saturation push sits on top of naturally. The result reads as professionally graded rather than filtered.

Artlist launched a full LUT catalogue in late 2024 designed by professional colorists and organised by mood, genre, and style. Their modern and cinematic categories both contain warm, golden grades that complement Hollywood Gold closely, and the library is available on their Footage and Templates plan alongside stock footage, video templates, and music, all covered under one licence. Explore the full Artlist LUT catalogue here:
The Artlist Essential LUTs collection is particularly useful for creators who want a smaller, curated set rather than a library of hundreds. It covers the most-used looks across lifestyle, travel, and commercial content, which overlaps well with the content types that Hollywood Gold suits best. If you are grading a travel series or a set of brand videos across multiple episodes, using Hollywood Gold as a unifying base and pulling from Artlist's cinematic and modern LUTs for individual scenes gives you a consistent warmth across the project while still giving each piece its own character.
The workflow that gets the best results from combining this free LUT with premium options is simple. Apply Hollywood Gold to an adjustment layer at 50 to 60 percent as your base. Add the premium LUT above it on a second adjustment layer at 40 to 50 percent. The two grades interact rather than override each other, which produces a result with more depth, nuance, and tonal complexity than either grade achieves on its own. It is the same layering approach professional colorists use in high-end commercial work, and it is available to anyone with access to a standard editing timeline.
Does Hollywood Gold work on footage shot indoors under artificial light? Yes, but it works best when the artificial light is already warm in quality, such as tungsten bulbs, warm LED panels, or practical lighting with a warm colour temperature. If your indoor footage is lit with cool white LEDs or fluorescent lights, the grade will introduce warmth that fights the existing colour temperature. In that case, reduce the opacity to around 50 percent or correct the white balance toward neutral first.
Does this LUT work on LOG footage? Hollywood Gold is a creative LUT designed for Rec.709 footage, which is the standard output profile for most cameras when not shooting in a flat or LOG picture profile. If you are shooting in Sony S-Log, Canon C-Log, DJI D-Log, or any other flat profile, you need to apply a technical conversion LUT first to bring the footage to Rec.709, then apply Hollywood Gold as the creative layer on top. Most camera manufacturers provide free technical LUTs on their official websites.
Can I use this LUT for commercial client work? Yes. This LUT is free for both personal and commercial use with no attribution required. You can use it in paid client projects, brand videos, advertisements, and broadcast work without any licence restrictions.
What is the best opacity to start with? Start at 70 percent and adjust from there. If the footage is already warm, 60 percent will feel more natural. If the footage is neutral or slightly cool and you want a stronger warmth statement, 80 to 85 percent gives a more pronounced result.
Will this work in DaVinci Resolve? Yes. In DaVinci Resolve, go to the Color page, right-click on a node, select LUTs, and import the .cube file. You can also browse to it directly through the LUT browser on the left side of the Color page.
Compatible with: Adobe Premiere Pro, After Effects, Final Cut Pro, CapCut Desktop, DaVinci Resolve, Vegas Pro, Avid Media Composer, and any editor that accepts standard .cube files.
File format: .cube, 33x33x33 3D LUT
Colour space: Rec.709
Licence: Free for personal and commercial use. No attribution required.

Download free video templates, LUTs, and presets for Premiere Pro, After Effects, DaVinci Resolve, CapCut, and Final Cut Pro.