.avif)
Freevisuals
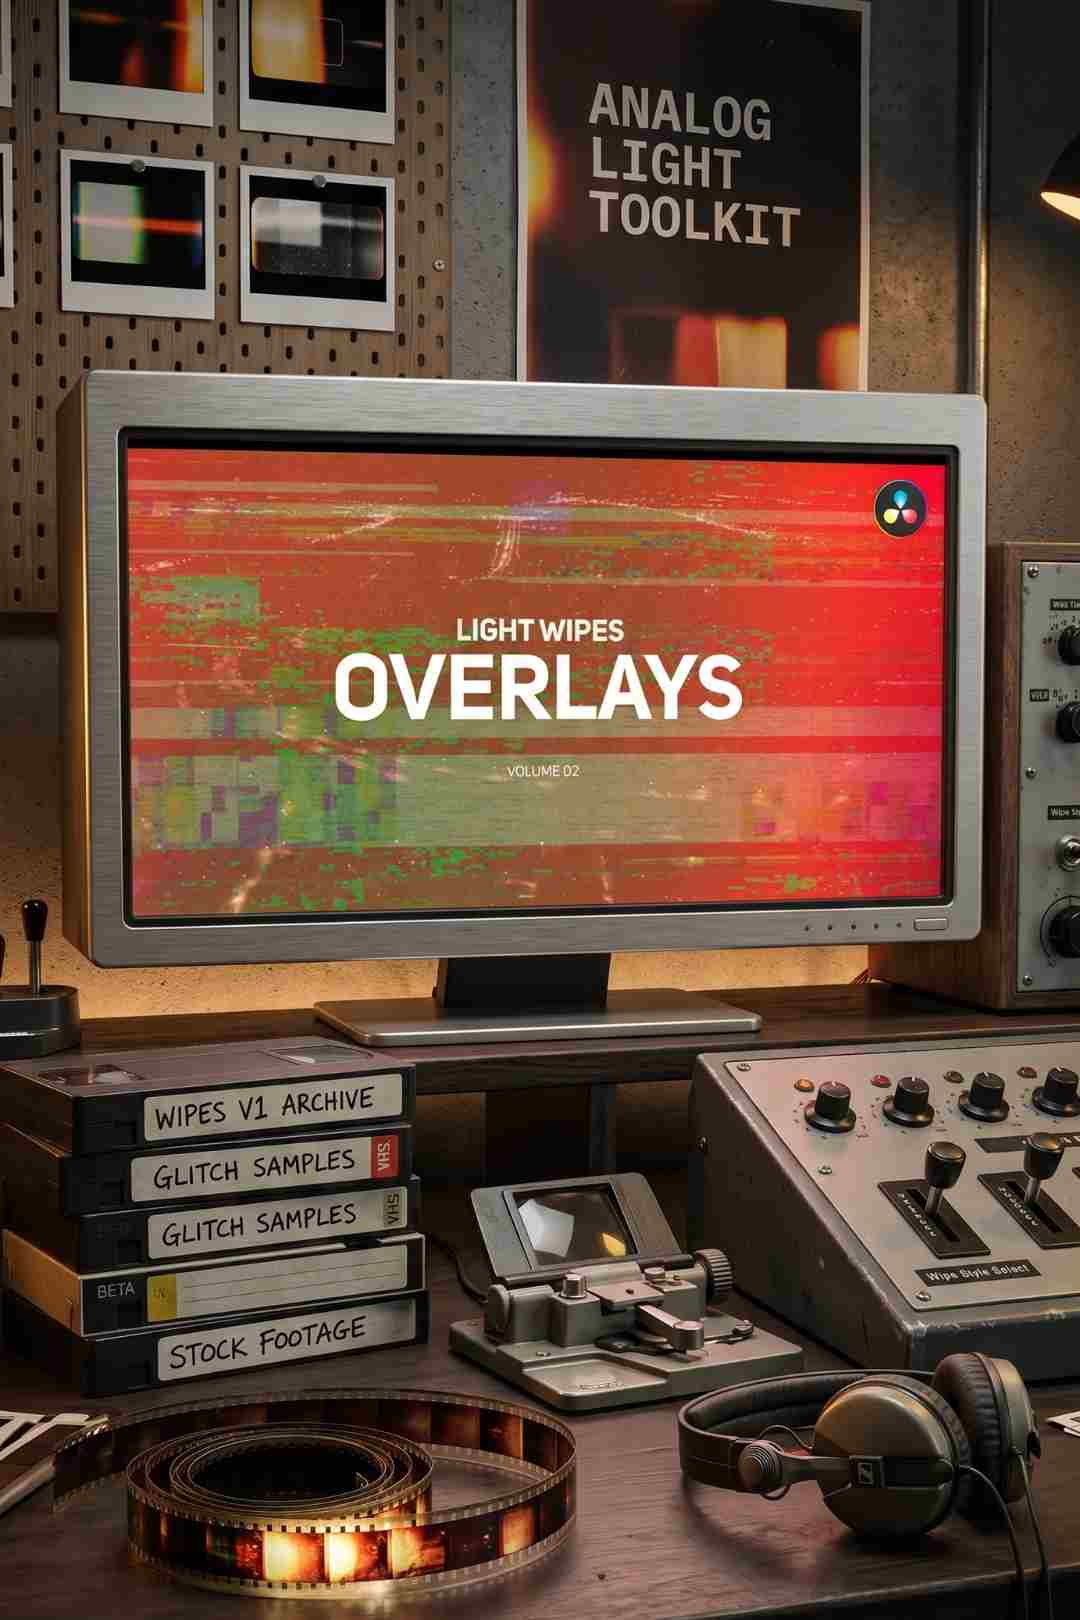
Wipe Light Overlays Vol. 02 is a cinematic light overlay pack for DaVinci Resolve. See what it includes, how to use it as a transition, and where...
Download FREEDownload NOW!Wipe Light Overlays Vol. 02 is a light effect pack built specifically for DaVinci Resolve, giving editors a ready made way to add cinematic light wipes, flares, and glowing streaks across a scene without filming any practical lighting effects on set. Used either as a standalone transition between two clips or as an atmospheric layer within a single shot, this pack adds a polished, professional touch to footage that might otherwise feel visually flat.
This template is available through Envato Elements, and Freevisuals is an affiliate partner. Clicking through and subscribing supports Freevisuals at no extra cost to you.
Get Wipe Light Overlays Vol. 02 on Envato Elements
Light wipe overlays sit at the intersection of a transition and a visual effect, since they can either bridge two separate shots together or simply sweep across a single piece of footage to add atmosphere and motion. This dual purpose makes the pack genuinely versatile across a wide range of content types, travel and adventure footage wanting an extra sense of cinematic polish, brand and promo videos wanting a premium, glossy finish, and music videos or high energy edits wanting a sharp, attention grabbing visual beat timed to a specific moment.
Because the pack is built specifically for DaVinci Resolve, it integrates directly into the same application many editors are already using for color grading and finishing, rather than requiring footage to be exported out to a separate compositing application purely to add this kind of light based effect.
Once downloaded, install the pack through DaVinci Resolve's template system, after which the included overlays become available directly within your Effects Library, ready to drag onto your timeline. For use as a transition specifically, position the overlay across the cut point between two clips, letting the light wipe motion carry the viewer's eye from one shot into the next. For use as a standalone atmospheric layer, place the overlay on a track above a single piece of footage and adjust its blend mode and opacity to integrate it cleanly with the scene beneath it.
Since light overlay packs like this one are typically filmed or rendered against a black background specifically so they can be removed through a blend mode rather than a traditional chroma key, setting the overlay layer's blend mode to Add, Screen, or Lighten will generally remove the black background automatically, leaving only the light streaks and flares themselves visible against your underlying footage.
These two videos cover working with light leak and light wipe overlays directly inside DaVinci Resolve, useful background for getting a clean, convincing result from a pack like this one.
While Add, Screen, and Lighten all generally work for removing a light overlay's black background, each produces a subtly different result depending on the brightness of your underlying footage. Add tends to produce the most vivid, intense result, brightening the light streaks considerably against darker footage specifically. Screen generally produces a slightly softer, more naturally blended result that can integrate more convincingly against footage that already has some brightness in the area the overlay passes over.
Testing your chosen overlay against a few different blend modes directly on your actual footage, rather than committing to one default choice without comparison, takes only a moment and consistently produces a cleaner final result.
Beyond simply adding atmosphere to a single shot, this pack's wipe based design makes it genuinely effective as a transition device specifically, the bright light sweeping across frame can momentarily obscure the cut point between two clips, disguising what might otherwise be a jarring or visually mismatched edit. This works particularly well when transitioning between two shots with different lighting conditions or color palettes, since the brief flash of light helps bridge that visual gap rather than cutting directly and abruptly between two noticeably different looking shots.
Timing the overlay precisely against your cut point, rather than placing it slightly before or after the actual edit, matters considerably for this specific use, since even a small misalignment can make the transition feel disconnected from the cut it is meant to be disguising.
For sound effects to accompany a light wipe transition, a whoosh or sweeping sound timed to the moment the light crosses frame, the Freevisuals free sound effects library offers options well suited to this kind of supporting audio cue. For a colour grade that complements this pack's cinematic, polished feel, the Freevisuals free LUT library includes treatments suited to travel, brand, and promo style content.
If you are building a complete DaVinci Resolve toolkit beyond this single overlay pack, the Freevisuals DaVinci Resolve templates library and free DaVinci Resolve presets cover further free options that pair naturally alongside this paid pack.
Since this pack comes through an Envato Elements subscription, the same membership unlocks the platform's broader library of complementary light effect and transition packs beyond this single volume. Browsing Envato Elements directly for additional light leak and overlay packs can help you build a varied personal library of atmospheric effects, rather than relying on a single pack for every transition throughout an entire project.
This pack's naming as Vol. 02 signals it belongs to a broader, ongoing series rather than a single standalone release, and creators who find this particular style of light wipe effective for their work often benefit from checking whether earlier or later volumes in the same series offer further variations on the same general aesthetic. Building a small personal collection across a few related volumes, rather than relying on just one, gives considerably more variety to draw from across a longer project or an entire content calendar, while still maintaining visual consistency since each volume in a series typically shares a similar underlying design language.
This approach also protects against the specific repetition risk that comes with using a single, finite pack repeatedly, since even strong individual overlays start to feel predictable if they are the only option a creator returns to across dozens of separate projects over time.
Since DaVinci Resolve is built around color grading as much as editing, considering how a light overlay pack like this one interacts with your overall grading workflow matters more here than it might in a purely editing focused application. Applying your primary color grade to your underlying footage before adding light overlays, rather than after, generally produces a more naturally integrated result, since the overlay's own color and intensity can then be fine tuned specifically against your footage's final, graded appearance rather than against an earlier, ungraded version that will look noticeably different by the time the project is finished.
For projects with particularly demanding color accuracy requirements, checking the overlay's appearance against your scopes alongside your underlying footage, rather than relying purely on visual judgment, helps confirm the combined result stays within your intended color range once both elements are combined in the final grade.
As you use this pack across multiple projects, you will likely discover specific overlay and blend mode combinations that work particularly well for certain recurring situations, a specific overlay that suits a sunset transition, another that works well for an interior to exterior cut. Keeping a simple personal note of these discovered combinations saves considerable time rediscovering the same effective pairings through trial and error on future projects.
Light overlay packs occupy a useful middle ground in terms of skill level required, genuinely easy enough for a newer editor to drag onto a timeline and produce an immediately usable result, while still offering enough creative flexibility through blend mode, opacity, and color adjustment for a more experienced editor to fine tune toward a specific, deliberate look. This makes a pack like this one a reasonable addition to almost any editor's toolkit regardless of their current skill level, since it scales naturally from a quick, simple application through to a more carefully integrated, professionally finished result depending on how much time and attention a specific project warrants.
Traditional digital transitions, simple cuts, fades, geometric wipes, clearly read as software generated effects regardless of how cleanly they are executed. Light based overlays like this pack instead mimic something that could plausibly have been captured in camera, a genuine lens flare, a reflection, a practical light source passing through frame, which gives them a noticeably more organic, filmic quality than a purely digital transition style.
This matters specifically for creators trying to achieve a more cinematic, premium feel across their content, since light based transitions tend to support that goal more convincingly than geometric or purely digital alternatives, even when both ultimately accomplish the same basic function of connecting two shots together.
Since this pack's overlays depend on bright, distinct light streaks reading clearly against your footage, testing a chosen overlay against the actual specific shots it will be used with, rather than judging it in isolation, confirms it produces a genuinely strong result once placed into your real project. An overlay that reads beautifully against one piece of footage can sometimes appear weaker or harder to see against footage with already high contrast or busy visual detail in the same area.
Varying which specific overlay from the pack you use across different moments within the same project, rather than reusing the exact same single overlay throughout an entire video, also helps avoid a repetitive, predictable feel across a longer piece of content using several transitions.
A common mistake is applying a light overlay at full opacity and intensity regardless of how bright or busy the underlying footage already is, producing a result that feels overblown rather than naturally integrated. Adjusting opacity downward specifically for footage that is already bright or visually active produces a more balanced, convincing result than applying the overlay at default settings universally.
Another mistake is using these overlays as transitions excessively throughout a single project, applying the same light wipe effect to every single cut rather than reserving it for genuinely significant scene changes. Used this way, the effect loses its impact considerably and can make an edit feel busy or repetitive rather than polished.
What software does this overlay pack work with?
This pack is built specifically for DaVinci Resolve.
Can I use these overlays as transitions between clips?
Yes, the wipe based design works well as a transition device, with the light sweep helping disguise the cut point between two shots.
Which blend mode should I use to remove the black background?
Add, Screen, and Lighten all generally work well, with the specific best choice depending on the brightness of your underlying footage.
What kind of content suits this pack best?
Travel and adventure footage, brand and promo videos, and music videos or high energy edits all suit this pack's cinematic light effects well.
Do I need an Envato Elements subscription to download this pack?
Yes, this pack is available through an Envato Elements subscription, which also unlocks the platform's broader library of complementary light effect and transition packs.

Download free video templates, LUTs, and presets for Premiere Pro, After Effects, DaVinci Resolve, CapCut, and Final Cut Pro.