.avif)
Freevisuals
50 cyberpunk & synthwave LUTs across 5 neon styles - Neon District, Synthwave Glow, Rain Reflections & more. For Premiere, Resolve, FCP & AE.
Download FREEGo Pro To DownloadDownload NOW!Not every look on FreeVisuals is about subtlety. Our free Rainy Neon City Street stock video and the growing interest around AI Cyberpunk City Rain video prompts told us something clear: there's a real audience here for bold, saturated, unapologetically futuristic color — gaming channels, tech reviewers, music videos, and anyone building a "night city" aesthetic into their content.
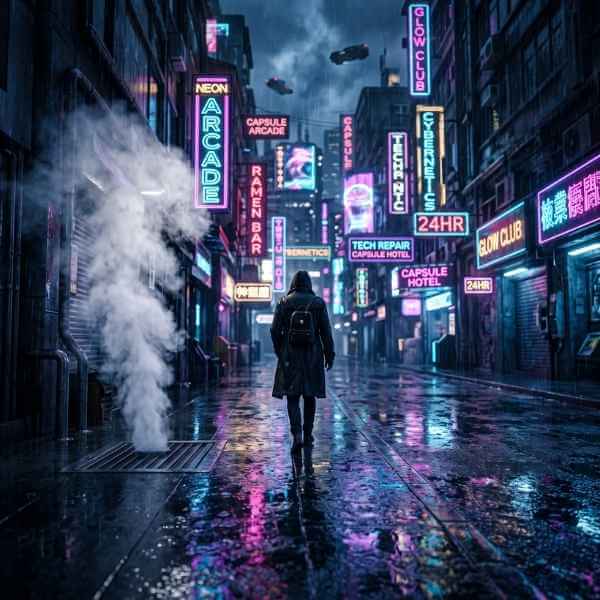
So we built Cyberpunk Neon Nights: 50 LUTs across 5 sub-styles, all built around the same core idea — cool blue-magenta shadow tones, neon-bright highlights, and enough saturation to make signage, wet pavement, and city lights genuinely glow. This isn't a subtle color correction pack. It's a full aesthetic.
Here's the complete breakdown, how to apply each style, and what pairs well with this look.
The cyberpunk look borrows its color logic from real neon signage and film noir cinematography, then pushes it further. Where teal-and-orange uses complementary colors for contrast, cyberpunk grading leans into cool-dominant palettes (blues, cyans, magentas, purples) with the occasional warm accent from a sign or streetlight breaking through — it's less about balance and more about creating a specific mood: dense, futuristic, slightly ominous, always a little wet.

If you want to understand the underlying technique, How I Color Grade the "CYBERPUNK" Look on Adobe Premiere Pro walks through the manual Lumetri process this pack is built to shortcut. For a Photoshop-based breakdown of the same color theory (useful even if you're purely working in video, since the color logic transfers), How to Apply Cyberpunk Style Color Grading & Neon Effects is a genuinely thorough explainer.
The most iconic version of the look — bold magenta and cyan pushed hard into both shadows and highlights, high saturation throughout. This is the "city at night, signs everywhere" grade, built for footage with visible light sources: signage, storefronts, street scenes.
Cooler and higher contrast than Neon District, built specifically around wet-street footage — the kind of shot where light bounces off pavement and creates that classic "rain-soaked city" cinematic texture.
For technique reference specifically on this style, Neon Film Look ~ Color Grading Tutorial DaVinci Resolve 18 covers a similar wet-street neon approach from scratch.
The most saturated set in the entire pack — purple and pink dominant, retro-futuristic, unmistakably synthwave. If your content leans into 80s-inspired aesthetics, music videos, or gaming content with a nostalgic edge, this is the sub-style to reach for.
Related: our Vaporwave Live Wallpaper asset shares the same color language and works well as a background loop or overlay layered underneath Synthwave Glow-graded footage.
A more restrained, desaturated cousin of the other four sub-styles — cooler, moodier, and lower saturation. Built for content that wants the cyberpunk mood (tension, technology, night) without the loud, high-saturation signature of the rest of the pack. Think tech review channels, cybersecurity content, or dark ambient gaming footage.
If you want a genre reference for this more subdued take, our own Cinematic Black & White Film Noir Collection shares a lot of the same contrast philosophy — worth pairing the two packs if your content moves between fully desaturated and cool-color scenes.
The gentlest, highest-key sub-style — softer neon tones, lifted shadows, and a more pastel, dreamlike character rather than the deep, saturated night-city look of the rest of the pack. Good for lighter sci-fi content, tech product showcases, or anything that wants a futuristic feel without heavy shadows.
All 50 LUTs are .cube files (33×33×33), compatible with every major NLE.
Premiere Pro: Lumetri Color panel > Creative tab > Look dropdown > Browse > select your file. Learn How To Create Cyberpunk Style Color Grading in Premiere Pro is a fast, focused walkthrough of the manual Lumetri settings behind this look, useful if you want to fine-tune further after applying a LUT.
DaVinci Resolve: Copy .cube files into your Resolve LUT folder, apply via the Color page node tree. If you're newer to Resolve's color tools generally, The Only Color Grading Guide You Need is a strong full-workflow primer worth watching once, regardless of which LUT pack you're applying.
Final Cut Pro: Copy files to your Motion Templates LUT folder, or apply via a compatible LUT plugin.
After Effects: Apply the Lumetri Color effect, then Basic Correction > Input LUT to browse to your file.
A tip specific to this pack: cyberpunk grading tends to shift skin tones more aggressively than teal-orange or black-and-white grades do, since it's pushing hard into blue and magenta rather than staying closer to natural hue ranges. If your footage includes faces (interviews, talking-head content, vlogging), start with a lower-numbered variant in whichever sub-style you choose, and consider using Lumetri's HSL Secondary panel to protect skin tones from the strongest color shift while keeping the background fully stylized.
(Affiliate disclosure: some links on this page may be affiliate links. If you make a purchase through one of these links, FreeVisuals may earn a commission at no extra cost to you. We only recommend products and platforms we genuinely believe in. Read our full disclosure policy.)
Will this look work on daytime footage, or only night shots?It's built for and works best on night, low-light, or already cool-toned footage. Applying a strong Neon District or Synthwave Glow LUT to bright daylight footage tends to produce an odd, oversaturated result rather than a convincing cyberpunk look — the effect relies on genuine shadow depth to push the color into.
Why do my skin tones look off after applying these LUTs?This is the most common issue with high-saturation cool-toned grades. Try a lower-numbered variant first, or use your NLE's secondary color tools (HSL Secondary in Premiere, Qualifiers in DaVinci) to isolate and protect skin tones while keeping the rest of the frame fully graded.
Which sub-style is best for gaming content specifically?Neon District and Dark Tech Noir are our most-used sub-styles for gaming channels — Neon District for high-energy montage and highlight content, Dark Tech Noir for more serious commentary or review-style videos.
Can I combine this pack with practical neon lighting on set?Yes, and it's genuinely the best way to get convincing results — footage lit with real colored gels or RGB lighting on set gives these LUTs much more to work with than flat, neutral lighting corrected after the fact. If you're shooting specifically for this look, lighting with cool blues and warm accent colors on set will noticeably outperform trying to create the entire effect in post.
Does this pack work for photography as well as video?Yes — as standard .cube files, all 50 LUTs can be imported into Lightroom's Profile Browser or applied in Photoshop via a Color Lookup adjustment layer, so the same looks work across your video and photo content if you're building a consistent visual brand across both.
If you're using this pack to establish a recurring aesthetic for a channel rather than a one-off video, resist the urge to rotate through all five sub-styles video to video. Viewers build brand recognition around consistent color language faster than almost anything else — pick one sub-style and one variant number as your "signature" grade, save it as a favorite or preset in your NLE, and reuse it as your default across every upload. Reserve the other four sub-styles for deliberate variation: a Synthwave Glow intro sequence, a Dark Tech Noir sponsor segment, or a Holographic Pastel outro card, while your main content stays anchored to one consistent look. This kind of intentional structure reads as polished and professional in a way that constantly switching grades never quite achieves.
Cyberpunk Neon Nights is available now as part of FreeVisuals Pro:
All 50 LUTs are yours to use across unlimited personal and commercial video projects. Want to see a specific aesthetic covered next? Let us know via our Contact page.
— The FreeVisuals Team

Download free video templates, LUTs, and presets for Premiere Pro, After Effects, DaVinci Resolve, CapCut, and Final Cut Pro.