.avif)
Freevisuals

Free cinematic teal and orange .cube LUT for Premiere Pro, DaVinci Resolve, Final Cut Pro and CapCut.
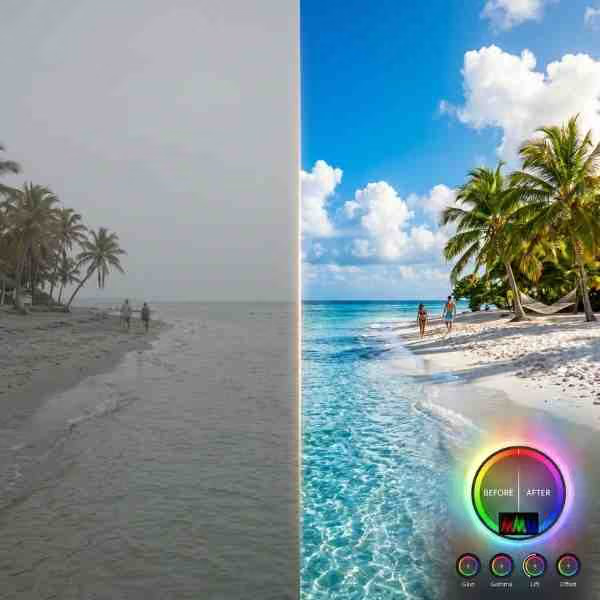
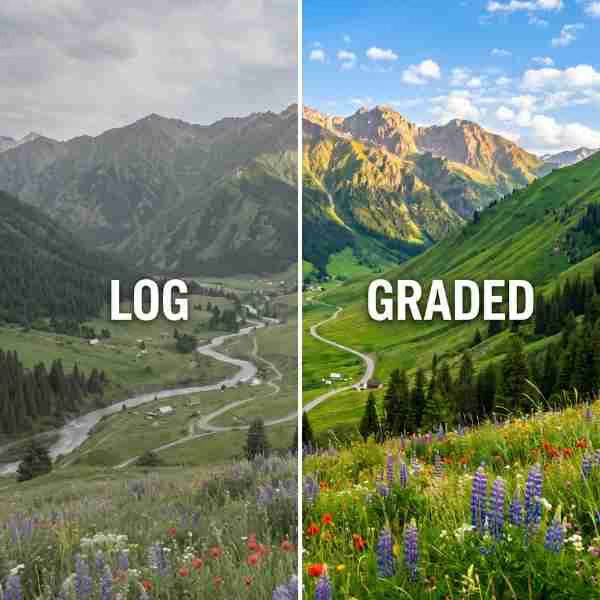
Download FREEThe teal and orange colour grade is one of the most recognisable looks in contemporary cinema and video content. It lifts skin tones and warm surfaces into rich amber and orange while shifting shadows and cool areas toward deep teal, creating a complementary contrast that reads immediately as high-production-value footage. This free LUT applies that look in a single click.
Download the Freevisuals Cinematic Teal and Orange LUT free using the button above. The .cube file is compatible with every major editing application and is free for personal and commercial use with no attribution required.
The Freevisuals Cinematic Teal and Orange LUT applies three primary colour transformations to your footage simultaneously. The warm tones - skin, sand, sunlight, wood, warm interiors - are shifted toward a rich amber and orange range that reads as saturated, sun-touched, and alive. The cool tones and shadows are shifted toward a deep, blue-green teal that creates a strong visual contrast with the warm subject matter. And the overall contrast is lifted slightly with a subtle matte finish in the blacks that prevents the shadows from appearing harsh or crushed.
The combination of warm orange subjects against cool teal backgrounds is one of the most natural visual contrasts available to a colourist. Human skin tones fall overwhelmingly in the orange range across all skin types and ethnicities, which means any footage featuring people will benefit from the orange grade on the subject. The teal shift in the shadows and cool areas then creates the complementary contrast that makes the subject pop from the background in a way that feels both dramatic and organic.
Teal and orange is not a trend. It is a permanent part of the visual grammar of cinema. The contrast between warm subjects and cool backgrounds is one of the oldest and most effective tools in colour grading.
Teal and orange are complementary colours on the colour wheel. They sit directly opposite each other, which means they create the strongest possible contrast between warm and cool tones without any of the clashing that occurs when two non-complementary colours compete for attention. This is not an accident of taste or fashion. It is basic colour theory applied to the natural distribution of colours in real-world scenes.
When a cinematographer or colourist applies a teal and orange grade, they are essentially amplifying a colour contrast that already exists in nature. Skin tones and warm surfaces are already trending orange. Sky, water, and shadows are already trending cool. The grade pushes each of those natural tendencies further in its own direction, which is why the result looks cinematic rather than artificial - it is an intensification of reality rather than a departure from it.
The look became widely associated with Hollywood blockbusters from the mid-2000s onwards, appearing consistently across action films, science fiction, and high-end commercial cinematography. It has since migrated into travel content, fashion photography, lifestyle video, and social media, where it remains one of the most immediately recognisable and consistently effective colour treatments in use.
Here is a practical walkthrough of achieving the cinematic teal and orange look using a free LUT in a video editing workflow. Shows the effect applied to real footage demonstrating how the grade transforms warm subjects against cool backgrounds across different footage types.
The teal and orange grade is not universally flattering on all footage. Understanding where it works best and where it works less well is the difference between a grade that looks intentional and one that looks wrong.
It works exceptionally well on travel and outdoor footage in warm climates. Golden hour and blue hour footage is the ideal environment - the warm highlights are already pushing toward orange and the cool shadows are already tending teal, so the grade intensifies what the natural light is already doing. Beach and coastal footage, desert landscapes, and warm city streets at sunset are all natural homes for this grade.
Portrait and lifestyle content with warm-toned subjects benefits strongly from the orange grade on skin tones, provided the background contains cool elements for the teal shift to work against. A portrait against a blue sky or a body of water will take this grade beautifully. A portrait against a warm interior background will produce an overly orange result that may need the intensity reduced.
Urban and architectural footage at night, with mixed warm and cool artificial lighting, takes the grade well. The warm tungsten elements of city lighting shift toward orange while the cool LED and fluorescent elements shift toward teal, producing a richly saturated, high-contrast nightlife aesthetic.
The grade works less effectively on overcast or grey-sky exterior footage where there is little warm-cool contrast in the natural light for the grade to amplify. It can also produce unnatural results on predominantly green environments - dense forest footage, for example - where the teal shift interacts with the green channel in ways that make vegetation look desaturated and strange. For green-dominant footage, the Free Mega Cinematic LUT Pack includes the Marine, Cyprus, and Beach grades which are better suited to green and natural environment footage.
For more Premiere Pro colour presets and LUT tutorials, browse the Premiere Pro colour presets section on Freevisuals and the Best Cinematic LUTs for Premiere Pro post.
For more detail on LUT installation in DaVinci Resolve, including exact file paths and troubleshooting, see the Where Are DaVinci Resolve LUTs Stored post on Freevisuals.
The Final Cut Pro Teal and Orange preset on Freevisuals is a dedicated Final Cut Pro version of this look available as a separate download if you prefer a native FCPX preset format.
Check out this detailed tutorial on achieving the orange and teal look in Premiere Pro from scratch using the Lumetri Color panel, covering the HSL secondary approach and how to use a LUT alongside manual adjustments for a more refined result than a LUT alone can achieve. Directly applicable to getting the most out of the Freevisuals Cinematic Teal Orange LUT.
Apply primary correction before the LUT. Get your exposure, white balance, and contrast roughly right before applying any creative grade. A LUT applied to footage that is underexposed, overexposed, or has a strong uncorrected colour cast will produce inconsistent and often unflattering results. Two minutes of primary correction before the LUT makes every grade look significantly better.
Start at 70 percent intensity. The full 100 percent application of this LUT is designed as a maximum, not a default. Most footage looks most natural and most cinematic at 70 to 80 percent. The full intensity works best on golden hour travel footage where you want maximum impact. Portrait and interview footage usually benefits from a reduction to 65 to 75 percent to keep skin tones looking healthy rather than over-saturated.
Use it on LOG footage with a technical LUT first. If your camera shoots in a LOG or flat picture profile, you must apply a camera-specific technical LUT to convert to Rec.709 before applying this creative grade. Applying any creative LUT directly to LOG footage will produce dark, muddy, and incorrect results. Most camera manufacturers provide free technical LUTs for their LOG profiles on their support websites.
Apply on an Adjustment Layer, not directly to the clip. Working on an Adjustment Layer keeps the grade non-destructive and gives you independent control over the intensity across multiple clips simultaneously. If you need different intensity levels on different clips in the same sequence, stack multiple adjustment layers or clip-level grades rather than altering the original clip colour information.
Combine with the Free Mega Cinematic LUT Pack. Stacking this teal and orange grade at 40 percent with the Sunset grade from the Mega Pack at 40 percent creates a richer, more complex warm-cool grade than either LUT achieves independently. Experiment with combining grades at lower individual intensities for more nuanced results.
Colour grading is one element of a complete visual system. Here are the assets that work best alongside the teal and orange aesthetic.
The Cinematic Teal and Orange LUT is one of a growing collection of free colour grading assets on Freevisuals. The Free Mega Cinematic LUT Pack gives you 22 distinct colour grades including warm, cool, vintage, dramatic, and experimental styles in a single free download. The 10 Free Cinematic LUTs pack covers additional grades specifically optimised for DaVinci Resolve and Premiere Pro workflows.
For Final Cut Pro users, the Final Cut Pro Teal and Orange preset is a dedicated native FCPX version of this look. The Final Cut Pro colour presets section has additional free grades compatible with FCPX.
For more on using LUTs in DaVinci Resolve including exact file paths and node-based workflow guidance, see the 10 Best DaVinci Resolve Color Grading Presets post and the Where Are DaVinci Resolve LUTs Stored post.
For premium colour grading tools and LUT packs when a project needs more range than a free pack can offer, Envato Elements has an extensive LUT library including dedicated teal and orange collections, film emulation packs, and cinematic colour grading suites available under a single subscription.
What does a teal and orange LUT do to my footage?
It shifts warm tones - skin, sand, sunlight - toward rich orange-amber while cooling shadows and neutral areas toward deep teal. The result is a high-contrast complementary colour palette that reads immediately as cinematic and gives footage a Hollywood blockbuster quality with a single application.
Is this LUT free for commercial use?
Yes. The Freevisuals Cinematic Teal and Orange LUT is free for personal and commercial use including YouTube, Instagram, client work, and broadcast. No attribution is required. See the Freevisuals terms for full licence details.
What software is this LUT compatible with?
Adobe Premiere Pro, After Effects, DaVinci Resolve, Final Cut Pro, Lightroom Classic, CapCut Desktop, Vegas Pro, HitFilm, and any other application that accepts standard .cube format LUT files.
What intensity should I apply this LUT at?
Start at 70 to 80 percent. The full 100 percent is designed as a maximum, not a default. Portrait footage benefits from 65 to 75 percent to keep skin tones natural. Golden hour travel footage often works well at 80 to 90 percent for maximum impact.
Does this LUT work on LOG footage?
This is a creative LUT designed for Rec.709 footage. If you shoot in a LOG or flat picture profile, apply a technical conversion LUT to bring your footage to Rec.709 first. Applying a creative LUT directly to LOG footage will produce dark, incorrect results.
Why is teal and orange so popular in film and video?
Teal and orange are complementary colours sitting directly opposite on the colour wheel, creating the strongest possible warm-cool contrast. Human skin falls naturally in the orange range, making subjects pop against cool backgrounds. The look has been used extensively in Hollywood cinematography since the late 1990s and is associated with premium production value.
How do I apply a LUT in Premiere Pro?
Create an Adjustment Layer, select it, open the Lumetri Color panel, go to the Creative tab, click Browse next to the Look dropdown, navigate to the .cube file and select it. Use the Intensity slider to adjust the strength to taste.
What footage types work best with teal and orange?
Travel and outdoor footage in warm climates, golden hour landscapes, portrait and lifestyle content, beach and coastal scenes, and urban environments with mixed warm and cool lighting all suit this grade well. It works less effectively on overcast grey-sky footage and dense forest environments.
Download free video templates, LUTs, and presets for Premiere Pro, After Effects, DaVinci Resolve, CapCut, and Final Cut Pro.