.avif)
Freevisuals
50 horror & thriller LUTs across 5 styles - Sickly Green, Found Footage Grit, Cold Steel Thriller & more. For Premiere, Resolve, FCP & After Effects.
Download FREEGo Pro To DownloadDownload NOW!Horror and thriller content lives and dies on atmosphere, and color grading does more of that work than most creators realize. Our free Horror Thriller Desaturated LUT has consistently pulled solid downloads from exactly the audience you'd expect — horror YouTubers, true crime channels, indie filmmakers, and thriller trailer editors who need their footage to feel tense before a single jump scare or plot beat happens.
Horror & Thriller Desaturated expands that single free LUT into a full 50-LUT collection across 5 genre-specific sub-styles. This pack sits apart from our Black & White Film Noir Collection — that one is true monochrome drama; this one keeps a hint of sickly, unsettling color, which is a completely different genre signal to a viewer's eye.

Here's the full breakdown.
There's a reason horror rarely goes fully monochrome the way noir drama does — color, even suppressed color, keeps a scene feeling wrong rather than simply stylized. A sickly green or cold blue-grey cast reads as sickness, decay, or unnatural lighting in a way pure black-and-white doesn't. Full desaturation removes information; horror grading keeps just enough color to make the viewer's brain register that something is off, without being able to immediately articulate why.
This is well-covered ground in the genre: How to Color Grade for a Horror Movie Look in Premiere Pro breaks down exactly this psychology — dark, moody bases with greenish or bluish tints specifically because of how audiences have been trained by decades of horror cinema to associate those tones with dread.
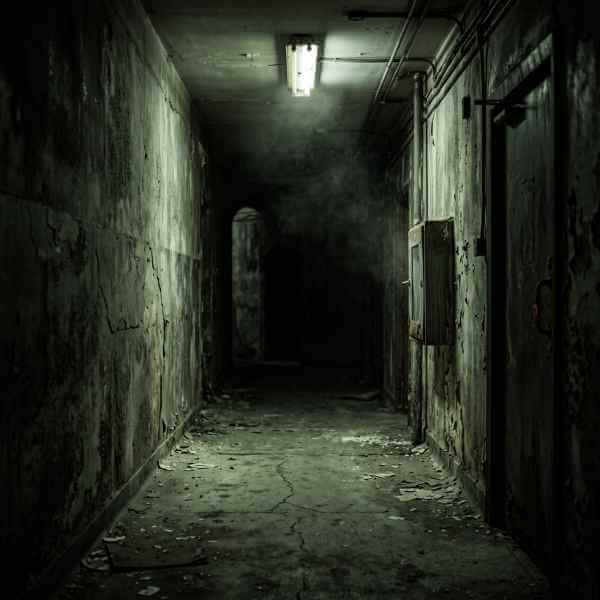
The most iconic horror color signature — a desaturated green-yellow cast that reads as sickness, decay, or unnatural lighting (think flickering fluorescent tubes or moonlight through dirty glass). This is the found-footage and creature-horror staple.
Higher contrast and grittier than Sickly Green, built specifically for handheld, POV, and mockumentary-style horror — the "shaky camera in the woods" aesthetic that's defined an entire subgenre since The Blair Witch Project.
For a full technique breakdown of this specific aesthetic, Easy Dark / Horror Effects Tutorial covers both the color and compositing side of building a convincing found-footage look.
The most heavily desaturated sub-style in the pack — cool-neutral, slow, and quiet rather than aggressively colored. Built for slow-burn psychological thrillers and dread-building sequences where the tension comes from stillness, not chaos.
Cool blue-grey tones throughout, clinical and controlled rather than sickly — built for crime thrillers, procedural content, and true crime storytelling where the tone is more "cold case" than "supernatural horror."
If you're building true crime or procedural content specifically, Netflix Thriller Look | DaVinci Resolve Color Grading Tutorial is a strong reference — the "dark, moody, high-tension" aesthetic it walks through closely matches what Cold Steel Thriller is built to deliver as a one-click starting point.
The genre outlier — deep red accents pushed against an otherwise desaturated base, reserved for high-tension horror moments: reveals, violence-adjacent scenes, or anything that needs to feel visceral rather than atmospheric.
All 50 LUTs are .cube files (33×33×33), compatible with every major NLE.
Premiere Pro: Lumetri Color panel > Creative tab > Look dropdown > Browse > select your file. Color Grading in Premiere Pro CC - Horror Look is a fast, focused tutorial on building this exact aesthetic manually in Lumetri if you want to layer additional adjustments on top of a LUT.
DaVinci Resolve: Copy .cube files into your Resolve LUT folder, apply via the Color page node tree. Color Grading For Horror Films - DaVinci Resolve Tutorial covers node-based horror grading from scratch, useful context for pushing further after applying one of these LUTs as your base.
Final Cut Pro: Copy files to your Motion Templates LUT folder, or apply via a compatible LUT plugin.
After Effects: Apply the Lumetri Color effect, then Basic Correction > Input LUT to browse to your file.
A practical note specific to this genre: horror and thriller grading tends to work best layered with deliberately imperfect lighting rather than clean, well-exposed footage. If your source footage is very brightly and evenly lit, even the strongest variants in this pack may struggle to fully sell the mood — consider underexposing slightly on set, or pulling down exposure in your NLE before applying the LUT, for a noticeably more convincing result.
(Affiliate disclosure: some links on this page may be affiliate links. If you make a purchase through one of these links, FreeVisuals may earn a commission at no extra cost to you. We only recommend products and platforms we genuinely believe in. Read our full disclosure policy.)
Will these LUTs work on daytime or brightly lit footage?They'll apply, but the effect is significantly weaker on bright, evenly lit footage. Horror and thriller grading relies heavily on shadow depth and contrast to sell the mood — the darker and more directionally lit your source footage, the more convincing the result.
Why does Sickly Green make skin tones look unwell?That's intentional and part of the design — this sub-style is built to shift skin tones toward an unsettling, sickly cast. If you need the effect on background elements while keeping foreground subjects looking more natural, use a lower-numbered variant or mask the effect away from faces using your NLE's power windows or masking tools.
Which sub-style is best for true crime content specifically?Cold Steel Thriller is our most-used sub-style for true crime and procedural content — it reads as serious and clinical without tipping into supernatural horror territory, which suits documentary-style storytelling better than Sickly Green or Blood Moon Crimson would.
Can I use a lighter variant for suspense-building before a reveal, then switch to a stronger one for the reveal itself?Yes, and it's a genuinely effective technique — start a scene with a low-numbered variant (01–03) from Desaturated Dread or Cold Steel Thriller, then cut to a stronger variant (07–10) at the moment of reveal or tension peak. Because all 10 variants within a sub-style share the same underlying color language, the shift reads as heightened intensity rather than an inconsistent grade.
Do I need special lighting on set to get the most out of this pack?Not special, but deliberate. Horror and thriller grading responds best to footage with genuine shadow and contrast already present — practical lights kept out of frame, single-source lighting rather than flat even coverage, and windows or doorways used as natural framing for shafts of light against darkness. If you're shooting handheld for the Found Footage Grit sub-style specifically, resist the urge to over-light the scene for camera visibility; a certain amount of underexposure and visual uncertainty is part of what sells the genre.
The biggest mistake creators make with horror and thriller grading isn't choosing the wrong sub-style — it's applying maximum intensity to an entire video from the first frame. Genre grading works best as a contrast tool: if every scene looks equally desaturated and tense, the audience's eye adjusts and the effect stops registering as intentional. Reserve your strongest variants (08–10 in any sub-style) for key dramatic beats, and let earlier or calmer scenes sit at a lighter variant, or even ungraded. The shift itself — not the intensity in isolation — is what actually creates tension for a viewer.
Horror & Thriller Desaturated is available now as part of FreeVisuals Pro:
All 50 LUTs are yours to use across unlimited personal and commercial video projects. Got a specific horror or thriller subgenre you'd like us to cover next? Let us know via our Contact page.
The FreeVisuals Team

Download free video templates, LUTs, and presets for Premiere Pro, After Effects, DaVinci Resolve, CapCut, and Final Cut Pro.