.avif)
Freevisuals
Cursor Transitions Macros by UENO, DaVinci Resolve cursor click transitions for software demos and tech content. Download on Artlist.
Download FREEGo Pro To DownloadDownload NOW!Download On Artlist
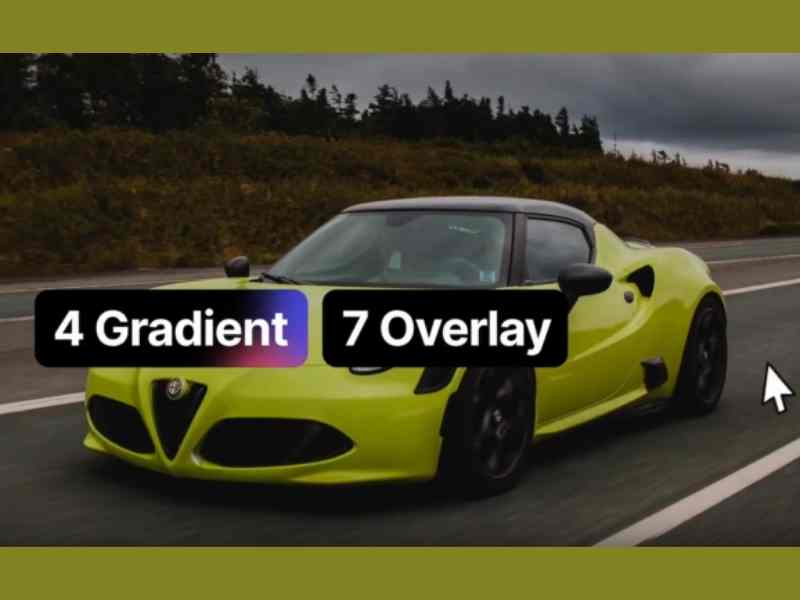
Most transition packs are built around wipes, zooms, or glitch effects, genuinely useful, but genuinely generic across almost any type of content. Cursor Transitions Macros by UENO, available through Artlist, takes a considerably more specific approach, built around simulated cursor movement and click animation, the exact visual language of a screen recording or software walkthrough. Delivered as a DaVinci Resolve macro rather than a full template, it installs directly into your Effects Library and applies to a cut point the same way a native Resolve transition does.
If you're building this into a broader software review or tutorial channel, our main DaVinci Resolve plugins roundup covers this pack alongside more than twenty other free and paid options worth having in your toolkit, genuinely useful if you want to see how this specific macro compares against the other transition and title options already covered there. For music with the kind of clean, modern energy that pairs naturally with tech and software content, Artlist carries a genuinely strong selection well suited to this exact tone.
Exact transition count, resolution, and file size were not independently confirmed at the time of writing beyond the product's confirmed identity and category. Confirm these specific details directly on the live product page before finalizing a project around exact delivery requirements.
A transition's job is to move a viewer's attention from one shot to the next without breaking the flow of whatever story or explanation is currently unfolding. For software demos, app walkthroughs, and tech review content specifically, a cursor click transition does this job in a genuinely reinforcing way, since it visually mirrors exactly the kind of interaction the content itself is actually about. A traditional wipe or zoom transition works fine in this context too, but it doesn't carry any inherent connection to the subject matter the way a simulated cursor click does.
This is why a genre specific transition style like this one earns its place in a serious tech content creator's toolkit even though it would look genuinely out of place in a travel vlog or a wedding video. It's not trying to be universally applicable, it's built specifically to reinforce one particular kind of content, and within that specific lane it does a job more generic transitions simply can't replicate as convincingly.
Head to the Artlist download page and download the macro pack.
On Mac, navigate to Library, then Application Support, then Blackmagic Design, then DaVinci Resolve, then Fusion, then Templates, then Edit. On Windows, navigate to Program Files, then Blackmagic Design, then DaVinci Resolve, then Fusion, then Templates, then Edit.
Within the Edit folder, you'll find category folders including Transitions, Titles, Generators, and Effects. Since this is a transition macro, place the downloaded files into the Transitions folder specifically. If this folder doesn't already exist, create it.
Fully close and reopen DaVinci Resolve so it recognizes the newly added macro files.
On the Edit page, open the Effects Library through the magic wand icon in the upper left corner. Your newly installed cursor transitions should appear within the Transitions section alongside Resolve's native transition options.
Drag the specific cursor transition you want directly onto the junction between two clips on your timeline, exactly as you would with any native Resolve transition.
Select your applied transition and open the Inspector panel to adjust color, size, duration, and motion, tailoring the specific look to your project's actual branding and pacing.
Play back your timeline to confirm the transition reads clearly at your specific cut point, then export using your project's standard settings.
For a genuinely useful walkthrough of the macro installation process this specific pack depends on, watch a tutorial covering DaVinci Resolve's Fusion Templates folder structure and Effects Library workflow directly. This is worth understanding thoroughly before your first macro installation specifically, since getting the folder structure right the first time avoids the most common reason a downloaded macro doesn't actually appear where you expect it to within Resolve.
The most directly obvious use case, transitioning between different screens or features within a software or app review video.
Step by step tutorials benefit from transitions that visually reinforce the instructional, click through nature of the content being demonstrated.
Companies showcasing their own software product benefit from transitions matching the actual interaction language their product itself uses.
Content covering technology news or commentary benefits from a consistent, genre appropriate visual identity across recurring segments.
Courses teaching software skills specifically benefit from transitions that feel native to the digital, click driven subject matter being taught.
Since most entries covered in our broader DaVinci Resolve plugins guide are full templates rather than macros, it's worth understanding this specific distinction clearly if you're newer to Resolve's broader plugin landscape. A template arrives as a complete project file, opened separately and containing its own composition with placeholders you fill in, then export or copy into your main project. A macro, by contrast, installs directly into your Effects Library and behaves like any other native Resolve tool, applied directly to a clip or cut point without needing to manage a separate project file at all.
This distinction genuinely affects your workflow speed once you're using either type of asset regularly. Templates require opening a separate file each time you want to use them fresh. Macros, once installed, are available instantly from your Effects Library for the lifetime of your Resolve installation, making them considerably faster to reach for repeatedly across many different projects.
For creators building a recurring software review or tutorial channel specifically, using this exact same cursor transition consistently across every video builds genuine viewer recognition over time. Rather than reaching for a different transition style each time, establishing this cursor based transition as your channel's signature scene change, paired with a consistent color matched to your brand, reinforces a considered, professional identity that a viewer starts to associate directly with your specific content before they've even processed what's actually being demonstrated on screen.
This kind of consistency matters more than many creators initially realize, since a recognizable, repeated visual signature is one of the more subtle but genuinely effective ways a channel builds a professional, trustworthy feel over time, distinct from relying purely on content quality alone to carry that same impression.
Since this transition style is specifically built around simulated cursor movement, it pairs particularly naturally with actual screen recording footage, the exact context where a genuine cursor would already be visible on screen. Using this macro specifically at the transition points between different screen recorded segments, rather than between camera footage of yourself talking, reinforces the transition's own visual logic most convincingly, since the simulated cursor movement feels like a natural continuation of the on screen interaction a viewer has already been watching rather than an unrelated stylistic flourish layered on top.
For projects mixing both screen recording and camera footage of a presenter, reserving this cursor transition specifically for the screen recording segments, while using a more conventional transition style for cuts back to camera footage, maintains this genuine visual logic throughout your entire project rather than applying the same transition indiscriminately regardless of what kind of footage it's actually connecting.
A frequent mistake involves placing the downloaded macro files in the wrong category folder, or in your general Templates folder rather than specifically within the Edit, then Transitions subfolder, which prevents it from appearing correctly within your Effects Library. Another common issue involves forgetting to fully restart DaVinci Resolve after installation, since the application only scans for new macro files during startup, not while already running.
Applying this specifically genre focused transition style to content outside its actual intended use case, a wedding video or a nature documentary, for instance, is another avoidable mismatch, since its cursor and click based visual language reads clearly as tech specific and can feel genuinely out of place elsewhere.
As with any Artlist asset, reviewing the current license terms before using this macro within paid client or commercial work is worth doing upfront, particularly for software companies and tech brands where licensing clarity carries genuine weight.
A macro installs directly into your Effects Library and applies to a clip or cut point like a native tool. A template is a separate project file with its own composition, opened and managed independently.
Into your Fusion Templates, Edit, Transitions folder, found under Blackmagic Design, DaVinci Resolve within your Application Support folder on Mac, or Program Files on Windows.
Yes, once applied to your timeline, select the transition and use the Inspector panel to adjust color, size, duration, and motion.
Software reviews, app walkthroughs, tutorial content, SaaS product demos, and tech commentary channels all genuinely benefit from its specific visual language.
Confirm you placed the files in the correct Transitions subfolder specifically, and that you've fully restarted DaVinci Resolve after installation, since it only scans for new macros on startup.
Cursor Transitions Macros gives DaVinci Resolve editors a genuinely distinctive, purpose built transition style rarely covered by more generic transition packs, tapping directly into the visual language software and tech content is already built around. Understanding the macro installation process, keeping this style reserved specifically for the tech and software content it's genuinely built for, and pairing it thoughtfully with complementary graphics and music, gets you the most value from this asset across reviews, tutorials, and product demo content.
Affiliate Disclosure: This post may contain affiliate links. If you make a purchase through one of these links, FreeVisuals may earn a commission at no extra cost to you. We only recommend products and platforms we genuinely believe in. Read our full disclosure policy.
Download free video templates, LUTs, and presets for Premiere Pro, After Effects, DaVinci Resolve, CapCut, and Final Cut Pro.