.avif)
Freevisuals
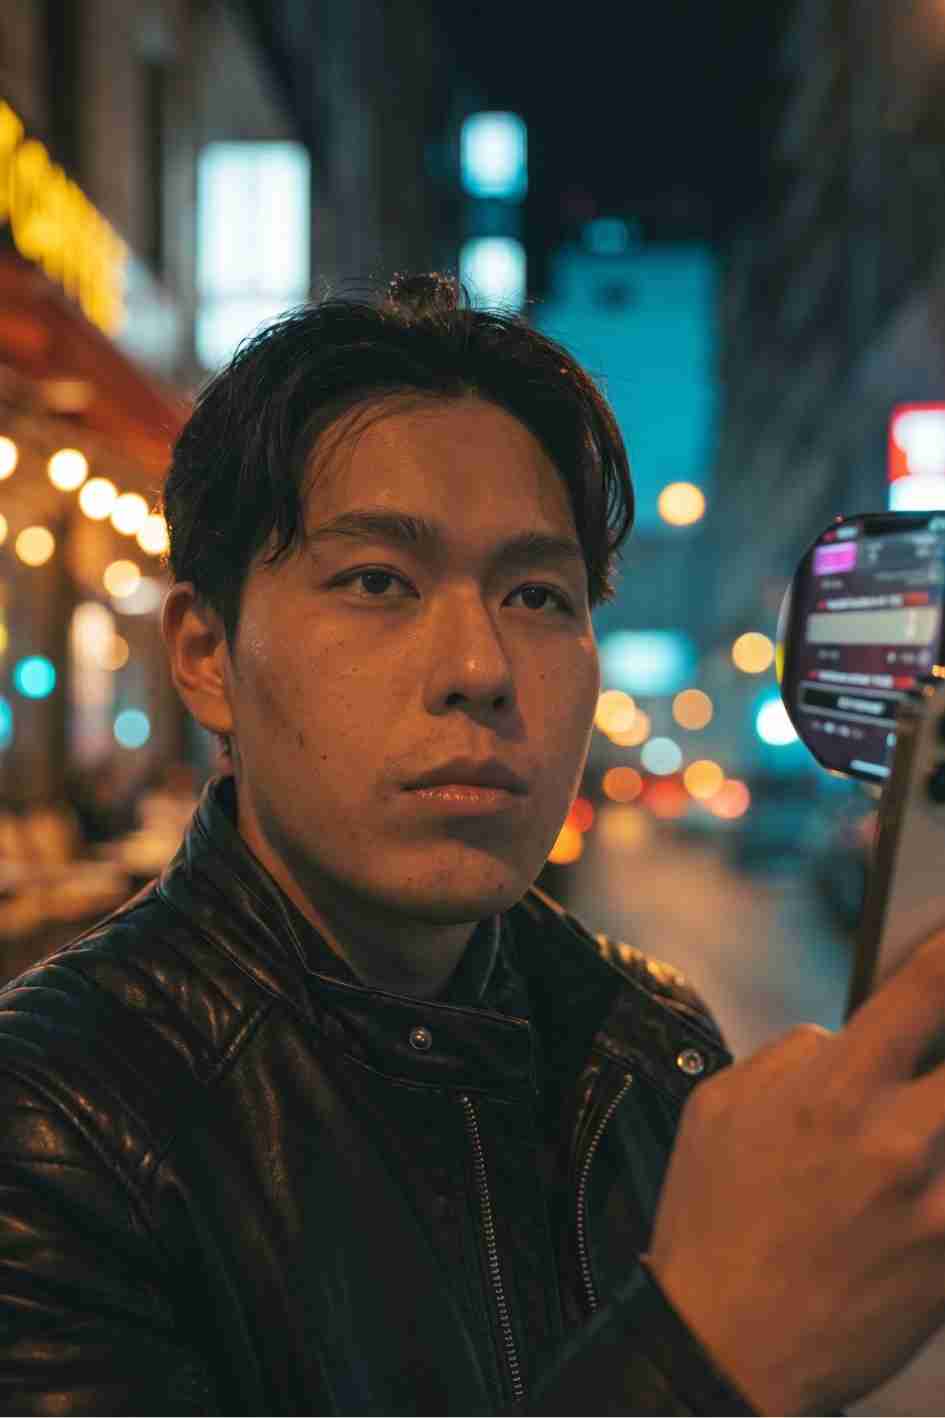
Free dramatic urban walk .cube LUT for Premiere Pro, DaVinci Resolve, Final Cut Pro and CapCut.
Download FREEA cinematic, gritty grade inspired by city environments, built for portrait shots with strong contrast and a cool, teal-leaning color shift. Dramatic Urban Walk is a 3D LUT designed specifically for portrait oriented footage with an urban feel, the kind of look you'd want for a street style fashion shoot, a moody city walk video, or any portrait content that wants a harder, more cinematic edge than a standard warm grade.
If you want a warmer or more vintage alternative, our Butterfly Effect LUT covers a softer, nostalgic look, and our full LUT library has more urban and cinematic options to compare. For music to pair with urban, street style content, Artlist and Epidemic Sound both carry moody, electronic, and hip hop influenced tracks that suit this kind of grade well.
Format: 32-point 3D LUT, compatible with Adobe After Effects, Premiere Pro, and DaVinci Resolve.
The contrast and cool tonal shift suit editorial, fashion, and street photography style video content. Fashion brands and independent stylists producing lookbook style videos benefit from this LUT's ability to give portrait subjects a polished, editorial edge against an urban backdrop.
Built specifically around a city, gritty aesthetic, well suited to walking tour, street, or urban lifestyle footage. Creators producing city guide content or street style walk-and-talk videos can use this LUT to establish a consistent, cinematic tone across footage shot in varied urban lighting conditions.
The dramatic contrast supports a hard, stylized visual identity over a naturalistic one. Music videos, particularly in genres with an urban or street aesthetic, benefit from the LUT's ability to make city environments feel cinematic rather than mundane.
The gritty, high contrast character suits skateboarding, parkour, and other urban sports content that already leans into a raw, street level aesthetic.
Short films and narrative projects set in urban environments can use this LUT to establish tone quickly, the cool, dramatic grade signals tension, grit, or moral ambiguity in a way a warm, soft grade wouldn't.
Download the .cube file from the link above.
Go to File > Preferences > System > General, then click Open LUT Folder. Copy the downloaded .cube file into this folder.
Resolve needs to be restarted, or the LUT list refreshed manually, before the new LUT appears in your browser.
Right-click your clip's node, choose LUT, and select Dramatic Urban Walk from your custom LUT folder.
Add Lumetri Color to your clip, open the Lumetri panel, go to Creative, click Browse under Look, and select the .cube file directly.
Apply the Apply Color LUT effect to your layer, then load the .cube file through the effect's browse option in the Effect Controls panel.
Before committing to this LUT across a full project, apply it to a test clip and check whether highlights are clipping or shadows are crushing too aggressively, this LUT's strong contrast response is more demanding on source footage than a subtler grade.
If your test clip shows clipping or crushing, correct exposure and contrast on the original footage first, then reapply the LUT, rather than trying to fix the issue after the LUT has already been applied.
Since this LUT is built with portrait use specifically in mind, check that skin tones still look natural and flattering on your specific subjects and lighting conditions before finalizing.
Given the strength of this LUT's contrast and color shift, reviewing your final export on a properly calibrated display helps confirm the grade reads as intended rather than being thrown off by an inaccurate monitor.
This LUT applies an aggressive, high-contrast adjustment, so it performs best on footage shot with good dynamic range, ideally in a flat log or RAW profile rather than a fully contrasted, baked-in camera picture profile. Footage shot in a standard, already-contrasty picture style can clip highlights or crush shadows once this LUT is applied on top. If your footage looks too dark or too harsh after applying the LUT, a small exposure or contrast adjustment before or after the LUT usually resolves it.
If you're shooting specifically for this LUT, consider slightly overexposing your footage during capture (within reason) to preserve more shadow detail, since the LUT's contrast curve will darken shadows further during grading. Shooting during overcast conditions or in shaded urban areas, rather than harsh direct sunlight, also tends to produce more usable dynamic range for this style of high-contrast grade.
Cool, teal-leaning color grades have become closely associated with urban, tech, and nighttime cinematography for a specific reason, city environments are dominated by artificial light sources, fluorescent, LED, sodium vapor, that naturally skew cooler and greener than daylight or warm tungsten sources. A teal-shifted grade leans into and exaggerates that existing quality rather than fighting against it, which is part of why this style of grade tends to feel authentic to urban environments rather than artificially imposed.
There's also a genre association at play. Teal and cool toned grading has been used consistently across crime dramas, tech thrillers, and urban set films for long enough that audiences now read it as visual shorthand for exactly this kind of setting and tone. Applying a similar grade to your own urban footage taps into that existing audience association, helping your content read as intentional and cinematic rather than simply "unedited city footage."
Building a high-contrast, teal-shifted grade manually requires careful, shot-by-shot work with contrast curves, secondary color correction for skin tones, and often a separate power window or mask to protect faces from the same aggressive contrast being applied to the rest of the frame. A pre-built LUT like this one bakes those decisions in from the start, which means it's considerably faster to apply, but it's also less adaptive to the specific lighting conditions of each individual shot than a colorist working manually would be.
For most independent creators, this tradeoff favors the LUT. The speed and consistency of applying a single, well-built LUT across a project outweighs the marginal benefit of a fully custom grade for the vast majority of content, particularly given how much time urban and street content creators typically need to spend on filming and logistics rather than post production. Where manual adjustment still adds real value is on individual shots with unusual lighting, a portrait shot directly under a colored neon sign, for example, might need localized correction on top of this LUT to keep skin tones looking natural despite the unusual light source.
For photographers, videographers, and content creators specifically building a portfolio or personal brand around urban and street content, using the same grade consistently across a body of work does more than save time on any individual project. It builds a recognizable visual signature that ties otherwise unrelated shoots and locations together into a cohesive body of work. Clients and collaborators looking at a portfolio graded consistently with a LUT like this one get a clearer sense of a specific visual style than they would from a portfolio where every project uses a different, unrelated grade.
This matters particularly for fashion and street style photographers and videographers pitching for new work, since a consistent aesthetic across a portfolio makes it easier for a potential client to understand exactly what visual outcome they're likely to get before committing to a booking.
Applying this LUT to footage with limited dynamic range. Since the contrast adjustment is aggressive, footage that's already high contrast or shot in harsh, direct light can clip or crush significantly once this LUT is applied on top.
Using this LUT for soft, romantic, or warm toned content. The cool, dramatic character works against content that wants a warm, inviting feel, this LUT is built for grit and edge, not softness.
Not checking skin tones carefully on darker skin tones specifically. High contrast grades can sometimes reduce visible detail in darker skin tones more than lighter ones, always check your specific footage and adjust exposure or contrast locally if needed.
Applying the LUT before correcting exposure. Always correct basic exposure and white balance issues on your original footage first, then apply this LUT, rather than trying to grade and correct simultaneously.
Ignoring how the grade holds up across different lighting conditions in the same project. Urban footage often includes a mix of shaded, direct sun, and artificial light shots within the same project, test this LUT across a representative sample before committing to it for an entire edit.
Light Leaks Transitions In DaVinci Resolve 18 Tutorial, useful if you want to pair this LUT's dramatic urban character with matching transitions for a fuller cinematic sequence.
Footage shot in a flat log or RAW profile with good dynamic range handles this LUT's contrast most cleanly. Standard, already-contrasty footage may need exposure adjustment first.
It's built and optimized specifically for portrait content, though the urban, high-contrast look can work on general city and street footage too.
It can, since the contrast curve pushes highlights and shadows further apart. If shooting in direct sunlight, consider slightly underexposing to preserve highlight detail before applying the LUT.
The LUT is built to flatter skin tones generally, but as with any high contrast grade, it's worth checking your specific footage carefully, since contrast heavy grades can sometimes reduce visible detail more on darker skin tones.
Yes, free for both personal and commercial projects.
Yes, though the grade is specifically tuned for urban environments and artificial city lighting, it may look different or less intentional applied to natural, rural, or daylight-dominant footage.
Affiliate Disclosure: This post may contain affiliate links. If you make a purchase through one of these links, FreeVisuals may earn a commission at no extra cost to you. We only recommend products and platforms we genuinely believe in. Read our full disclosure policy.
Download free video templates, LUTs, and presets for Premiere Pro, After Effects, DaVinci Resolve, CapCut, and Final Cut Pro.