.avif)
Freevisuals
Get 50 professional teal & orange LUTs across 5 cinematic styles. Works in Premiere Pro, DaVinci Resolve, Final Cut Pro & After Effects. Download now.
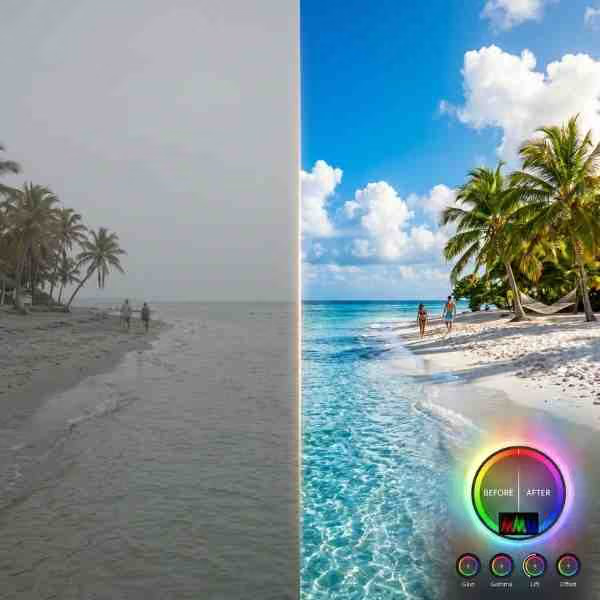
Download FREEGo Pro To DownloadDownload NOW!If there's one look that keeps showing up in your downloads, it's this one. Our free Cinematic Teal & Orange LUT has been downloaded thousands of times in the last two months alone, and the Final Cut Pro version and Mega LUT Pack aren't far behind. It's the most requested cinematic color grade on the internet, full stop — the look behind everything from summer blockbusters to the YouTube video essay you watched last night.
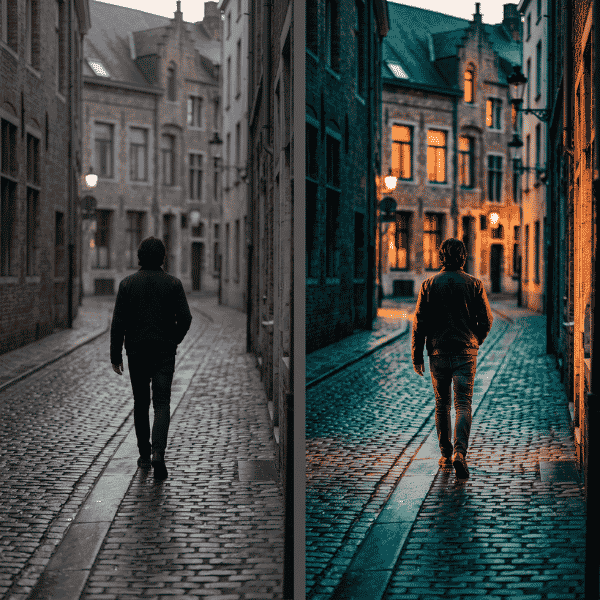
So we built the version we always wanted to release: not one teal-orange LUT, but fifty. The Cinematic Teal & Orange Pro Collection is a Pro-exclusive pack of 50 professional 3D LUTs (.cube format), organized into five distinct sub-styles so you're not just getting the same look 50 times — you're getting five genuinely different moods, each with ten intensity variants to dial in exactly how strong you want the grade.
Here's a full breakdown of what's inside, how to use each style, and a few free resources and tools worth pairing them with.

Before diving into the pack, it helps to know why this look is everywhere. Teal and orange sit on opposite sides of the color wheel, which means pushing shadows toward teal and skin tones/highlights toward orange creates maximum visual contrast without looking unnatural — skin tones are naturally orange-leaning, so the grade flatters faces while making the rest of the frame pop. It's become the de facto "cinematic" look because it does a lot of visual work with very little effort.
If you want to understand the technique from the ground up rather than just applying a LUT, this is a genuinely good breakdown of the color theory: Teal & Orange Cinematic Color Grading in Premiere Pro. For DaVinci users, Understanding and Creating Different Types of Teal & Orange Looks goes further and explains how subtle changes in the tint shift the mood — which is exactly the idea behind our five sub-styles below.
This is the big, punchy version — deep teal shadows, saturated orange highlights, and boosted contrast. It's built for action, adventure, and any footage that needs to feel expensive. Think trailer footage, drone shots, car reveals, product launches.
If you're grading in Premiere Pro, this step-by-step Lumetri tutorial pairs well with the Blockbuster LUTs — apply the LUT first via the Creative tab, then use the techniques in this video for secondary adjustments on top.
A quieter, more restrained take. Lower saturation, gentler contrast, and a slightly desaturated overall feel — this is the look for character-driven content, interviews, and narrative work where you want mood without shouting about it.
The most saturated set in the collection. Built for landscapes, vlogging, and anything shot outdoors where you want the environment to feel vivid and alive — beaches, mountains, city exploration content.
Related: if you shoot a lot of outdoor or travel content, our Tropical Beach Ocean LUT and Free Dramatic Urban Walk LUT are built around similar warm, saturated palettes and make a solid free complement to this pack.
Cooler, darker, and higher contrast than the rest of the collection. This sub-style pulls warmth out rather than pushing it in, which makes it the odd one out in a teal-orange pack — but it's included because night and low-light footage benefit from the same shadow/highlight separation technique, just inverted toward cool tones.
For a deeper dive on grading dark, high-contrast footage specifically, The SECRET To Teal & Orange Color Grading In DaVinci Resolve 18 covers shadow manipulation techniques that apply well to this sub-style.
The gentlest set, designed specifically to flatter skin tones without overpowering the frame. Lower contrast, warm-leaning midtones, and a light touch on saturation — built for interviews, talking-head content, podcasts, and portrait photography-adjacent video work.
All 50 LUTs are standard .cube files (33×33×33 resolution), which means they work across every major NLE:
Premiere Pro: Open the Lumetri Color panel, go to the Creative tab, click the Look dropdown, choose Browse, and select your .cube file.
DaVinci Resolve: Copy the .cube files into your Resolve LUT folder, then apply via the Color page by right-clicking a node and navigating to LUTs. If new LUTs don't appear immediately, refresh your LUT database in Project Settings under Color Management. 3 EASY Teal & Orange Film Looks in DaVinci Resolve is a good companion video if this is your first time working with imported LUTs in Resolve.
Final Cut Pro: Copy the files into your Motion Templates LUT folder, or use a compatible LUT-import plugin if you're on an older FCP version.
After Effects: Apply the Lumetri Color effect to your layer, then under Basic Correction, use the Input LUT option to browse to your file.
A general rule across all five sub-styles: start with a middle-numbered variant (04–06) rather than jumping straight to the strongest option. It's much easier to layer a second pass of intensity on top of a subtle grade than to pull back an overly strong one without introducing banding or color artifacts.
Color grading is rarely the only thing a video needs. A few assets that work particularly well alongside a teal-orange grade:
A great color grade only shows up as well as your source footage and audio allow. A few tools and resources we regularly recommend to creators working on cinematic-style content:
(Affiliate disclosure: some links on this page may be affiliate links. If you make a purchase through one of these links, FreeVisuals may earn a commission at no extra cost to you. We only recommend products and platforms we genuinely believe in. Read our full disclosure policy.)
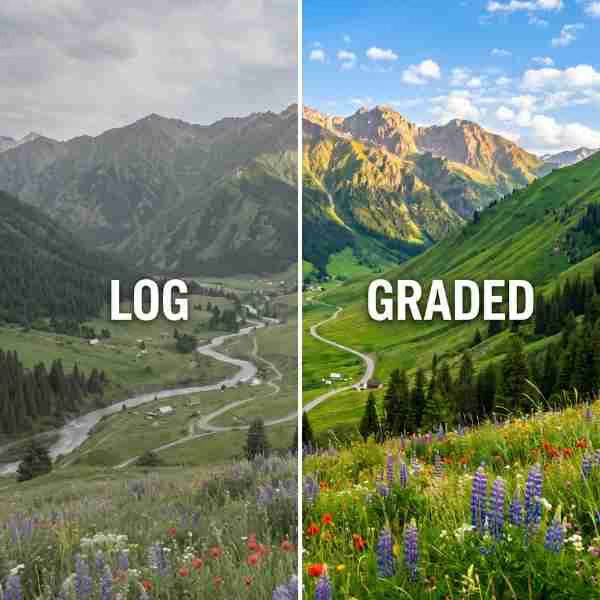
Do these LUTs work on log footage (S-Log, V-Log, C-Log, etc.)?These LUTs are designed for footage that's already been color-corrected to a standard Rec.709 base — they're creative "look" LUTs, not technical conversion LUTs. If you're shooting log, apply your camera manufacturer's log-to-Rec.709 conversion first (or do a manual white balance and exposure pass), then apply one of the 50 LUTs on top as your creative grade. Applying a creative LUT directly to flat log footage will usually look overly muted or shift colors unpredictably.
Will applying a LUT slow down my timeline?On most modern systems, no — 33×33×33 LUTs are lightweight compared to plugin-based color effects. If you notice lag in Premiere Pro specifically, try enabling GPU acceleration in your project settings, or render a preview file for the clip you're working on.
Can I stack more than one LUT?Technically yes, but we don't recommend it. Stacking two creative LUTs compounds their color shifts in ways that are hard to predict and often push skin tones into unnatural territory. If a single LUT from this pack isn't quite strong enough, use one of the higher-numbered variants (07–10) within the same sub-style instead of layering two different LUTs.
Which sub-style should I start with if I only try one?If your footage is general-purpose (a mix of shots, not committed to one specific mood yet), start with Blockbuster 05 or Travel & Adventure 05 — both sit in the middle of their intensity range and give a strong, immediately visible "cinematic" upgrade without being so aggressive that it's hard to dial back.
Can I use these in commercial projects, client work, or monetized YouTube videos?Yes. Your FreeVisuals Pro license covers personal and commercial use in finished video projects. The one thing it doesn't cover is redistributing or reselling the raw LUT files themselves — see the license section in the pack's README for full details.
If you're producing a series — a YouTube channel, a client's ongoing content, a multi-part story — picking one LUT from this pack and sticking with it (rather than switching sub-styles video to video) does more for your channel's visual identity than almost any other single decision. Viewers register consistent color grading as a brand cue even if they couldn't tell you why a channel "feels" professional. Pick your sub-style and variant number, save it as a preset or favorite in your NLE, and reuse it across your next several uploads before experimenting further.
The Cinematic Teal & Orange Pro Collection is available now as part of FreeVisuals Pro. You can grab it three ways:
However you get it, all 50 LUTs are yours to use across unlimited personal and commercial video projects. We'll be adding more themed LUT collections to the Pro library in the coming months — if there's a specific look or style you'd like to see covered next, let us know via our Contact page.
Happy grading.
— The FreeVisuals Team

Download free video templates, LUTs, and presets for Premiere Pro, After Effects, DaVinci Resolve, CapCut, and Final Cut Pro.